You can now follow @althaipaints on Twitter for site updates, for those of you who like to get updates that way instead of RSS or whatever.
Page 6 of 8
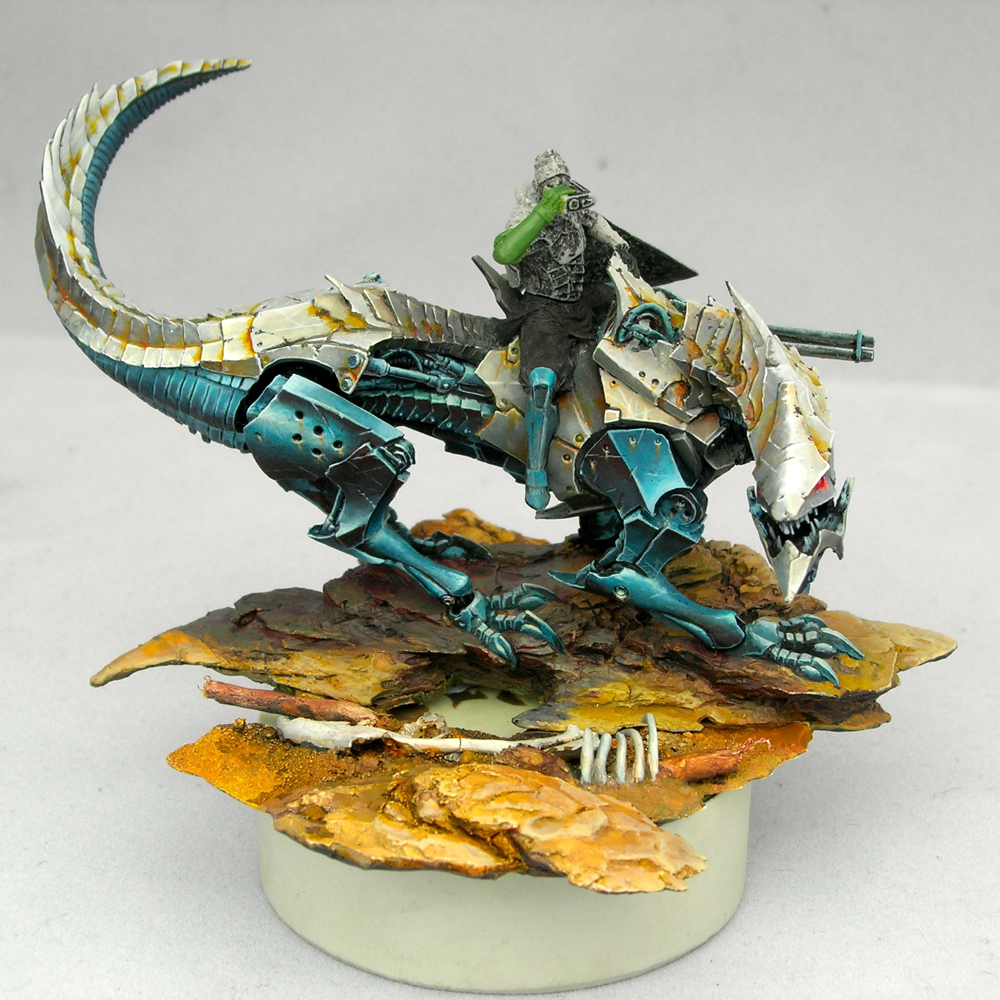
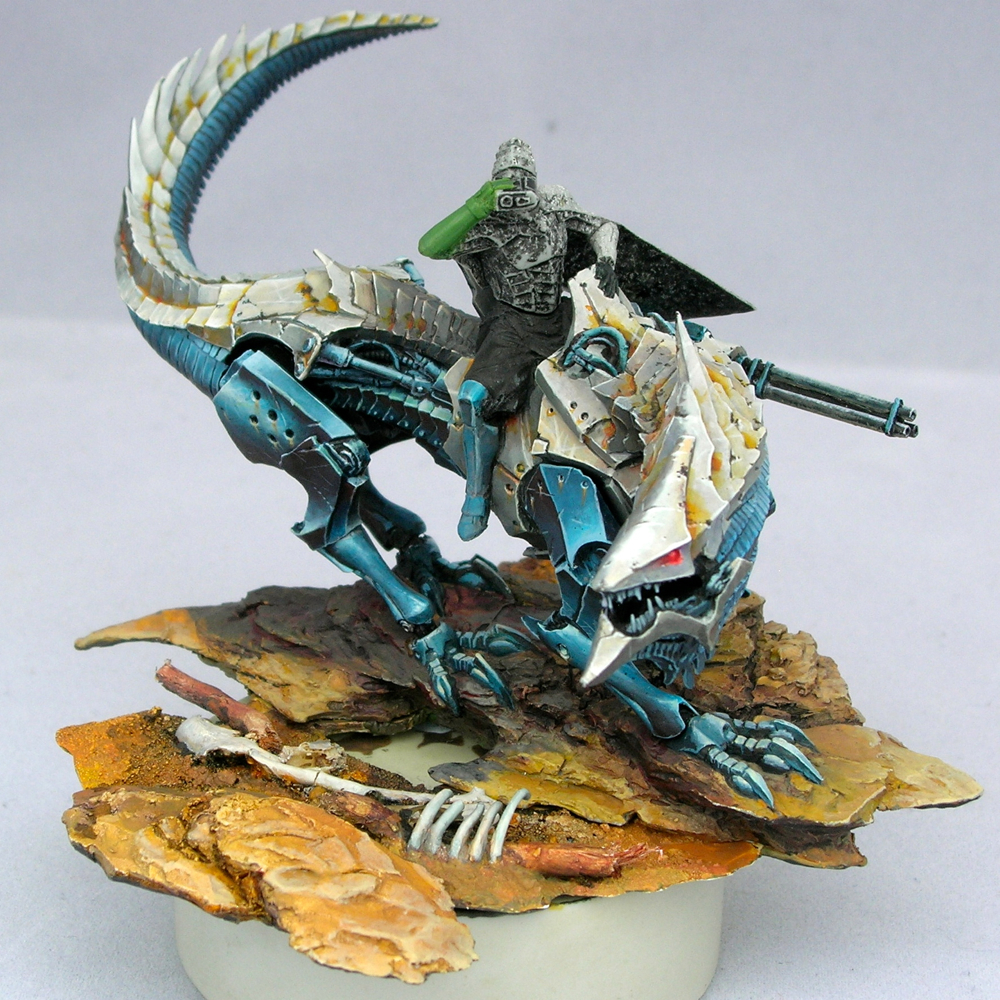
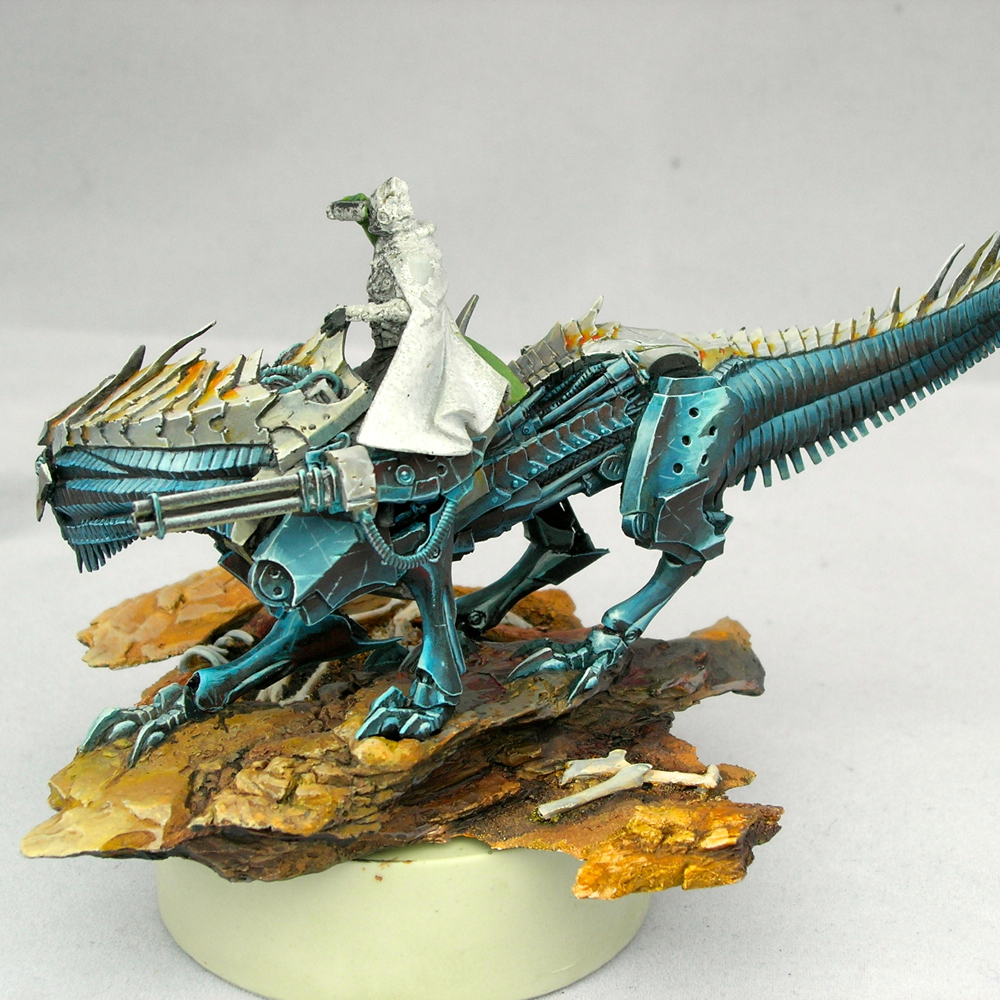
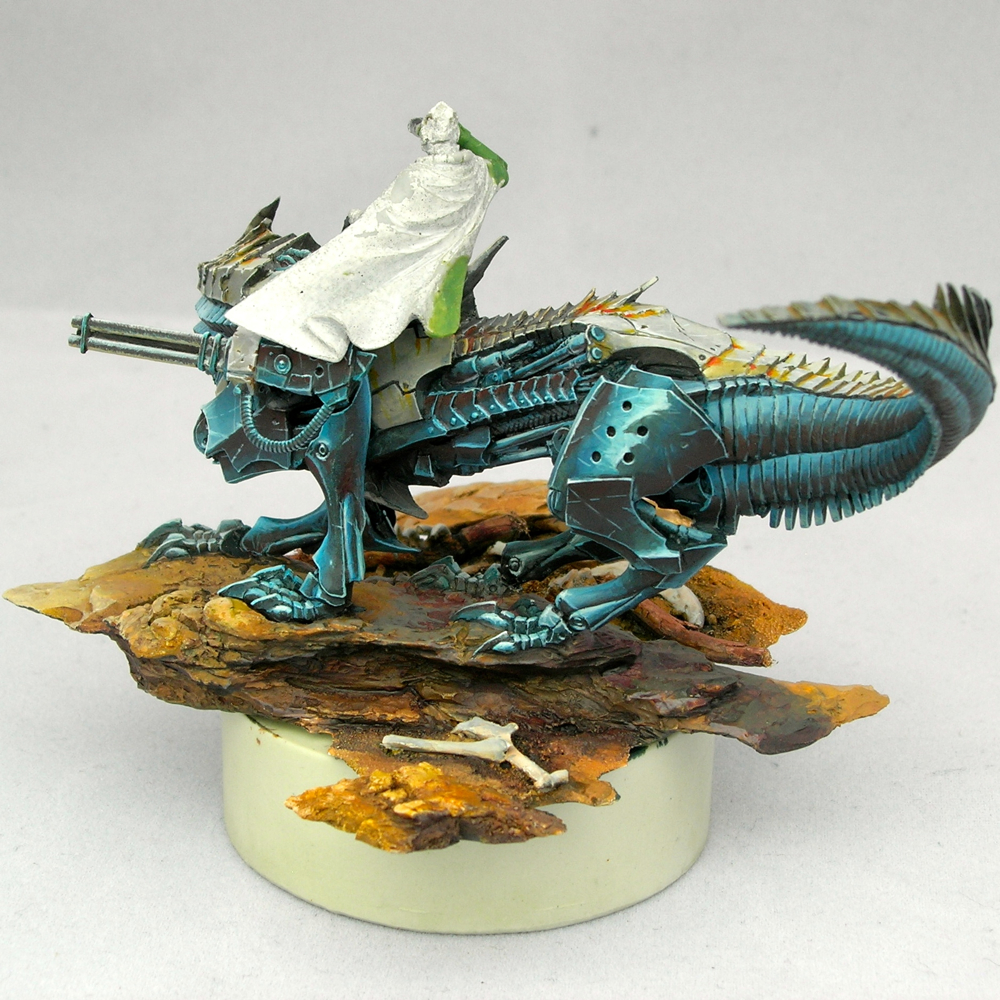
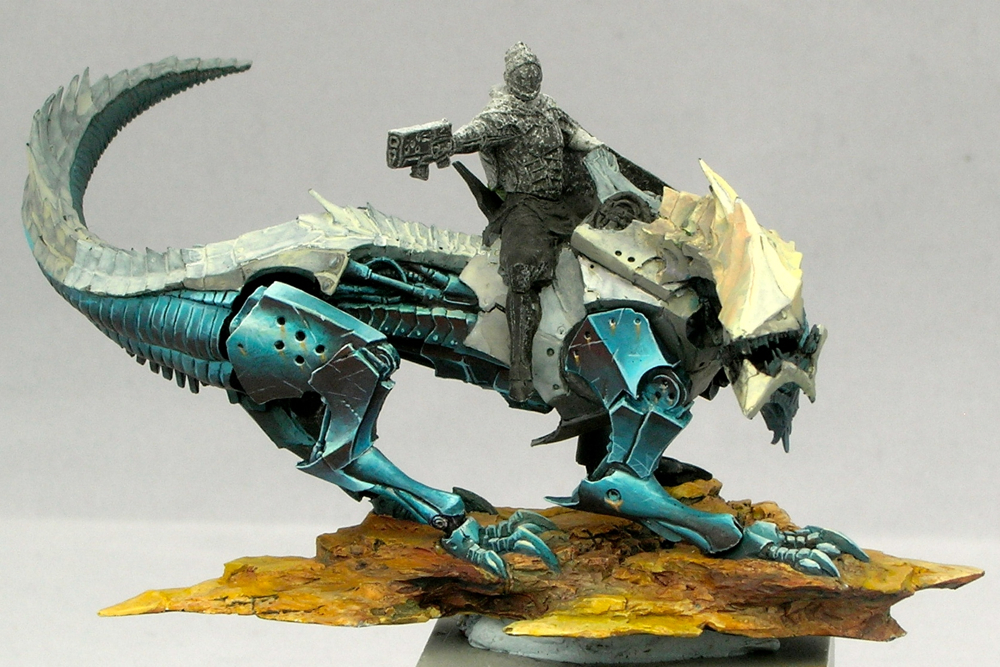
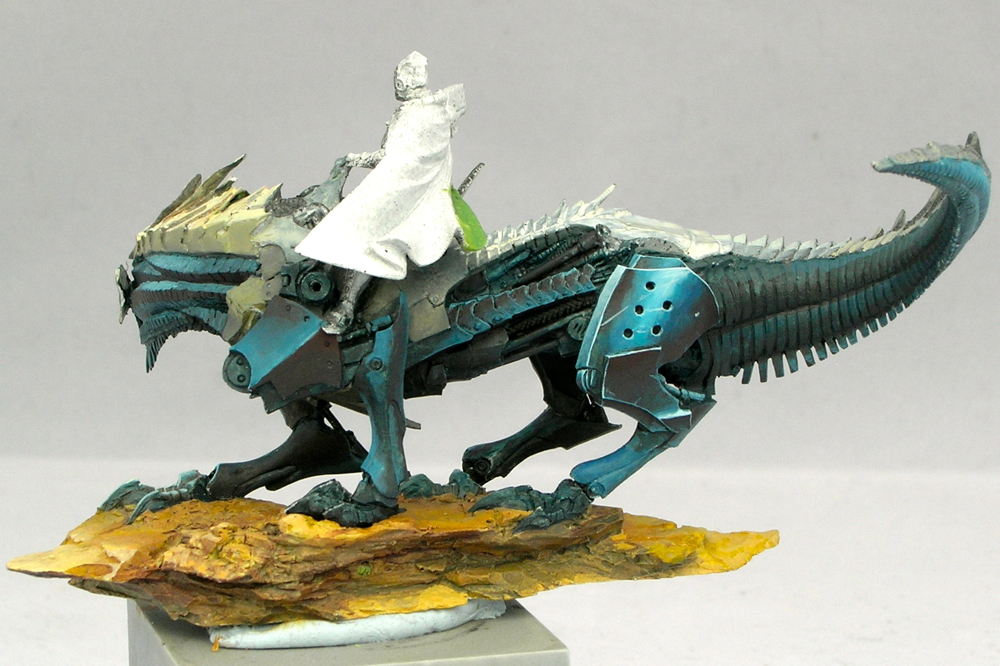
There’s been a lot of progress since part 1. The dragon body is nearly finished, and I’ve built out the base a bit.
I haven’t really put any paint on the rider yet, but I converted his arm holding a pistol into binoculars, which involved a fair amount of resculpting.
The round resin plinth he’s sitting on is only temporary, for holding him while I paint. I’m planning on putting him on a larger wood plinth eventually.
I’m not sure about the highlighting I did on the back leg in this shot. It doesn’t really make sense from a physics standpoint, but it also provides a sense of energy and motion which I like (and which was inspired by something Alfonso “Banshee” Giraldes said in a class I took from him). I’m going to leave it for now, and see how I feel about it when the rest of the mini is closer to finished.
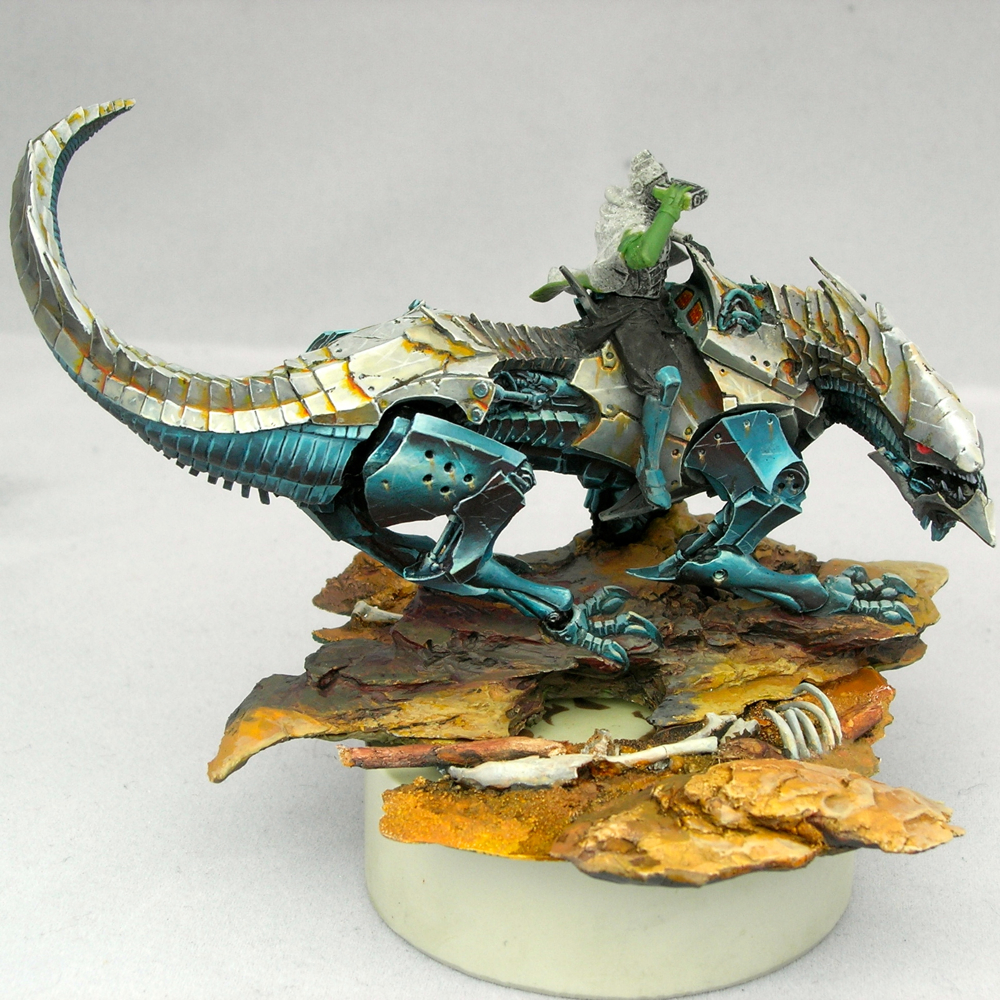
On to the rider! I’m off to Google some fabric reference for his clothing, since I still haven’t figured out what I’m going to do with it. I’m thinking about doing something inspired from West Asian or South Asian fabric patterns. I visited the Victoria and Albert Museum in London a couple of weeks ago while traveling for work, and there was a show on the Fabrics of India which got me thinking along those lines.
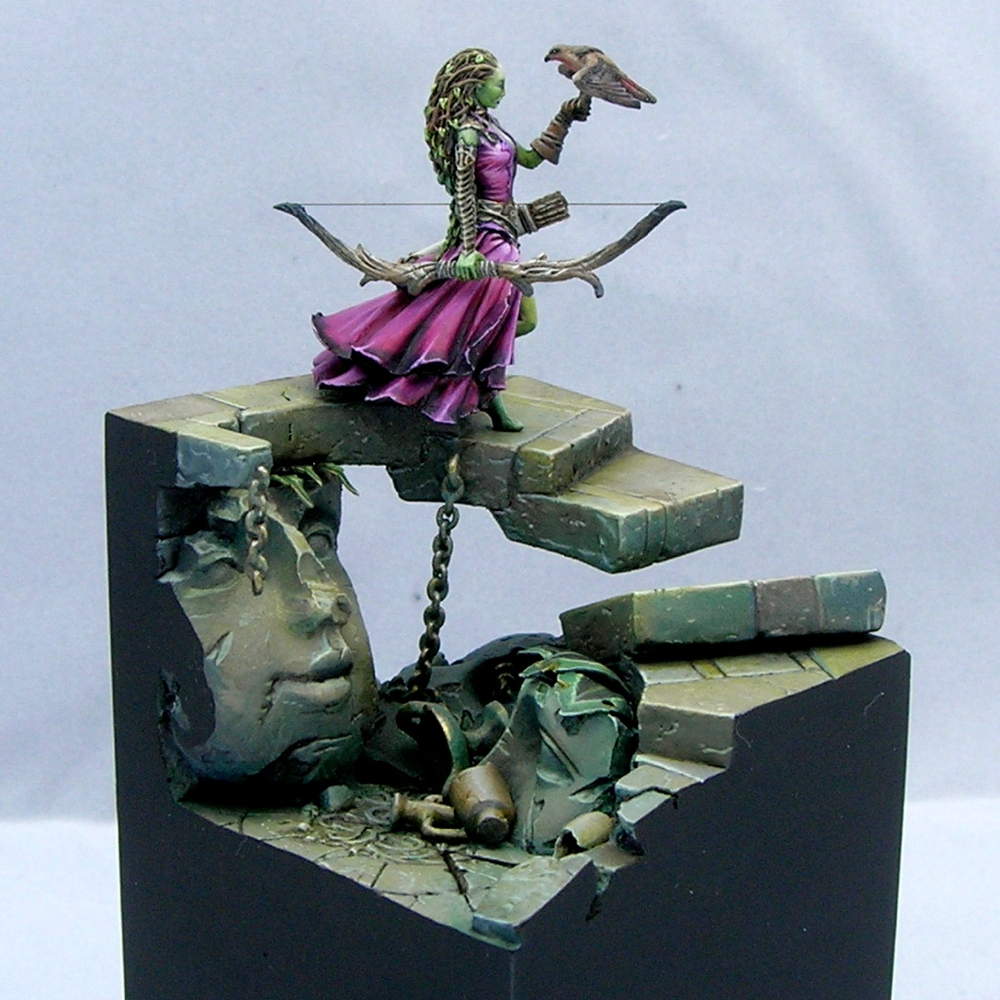
So it’s been almost a year since I posted the first WIP of this figure, and I’m finally ready to post the finished mini.

Sorry it took so long. I also meant to post more WIP photos, but that didn’t exactly happen. I promise to do better with my next project.
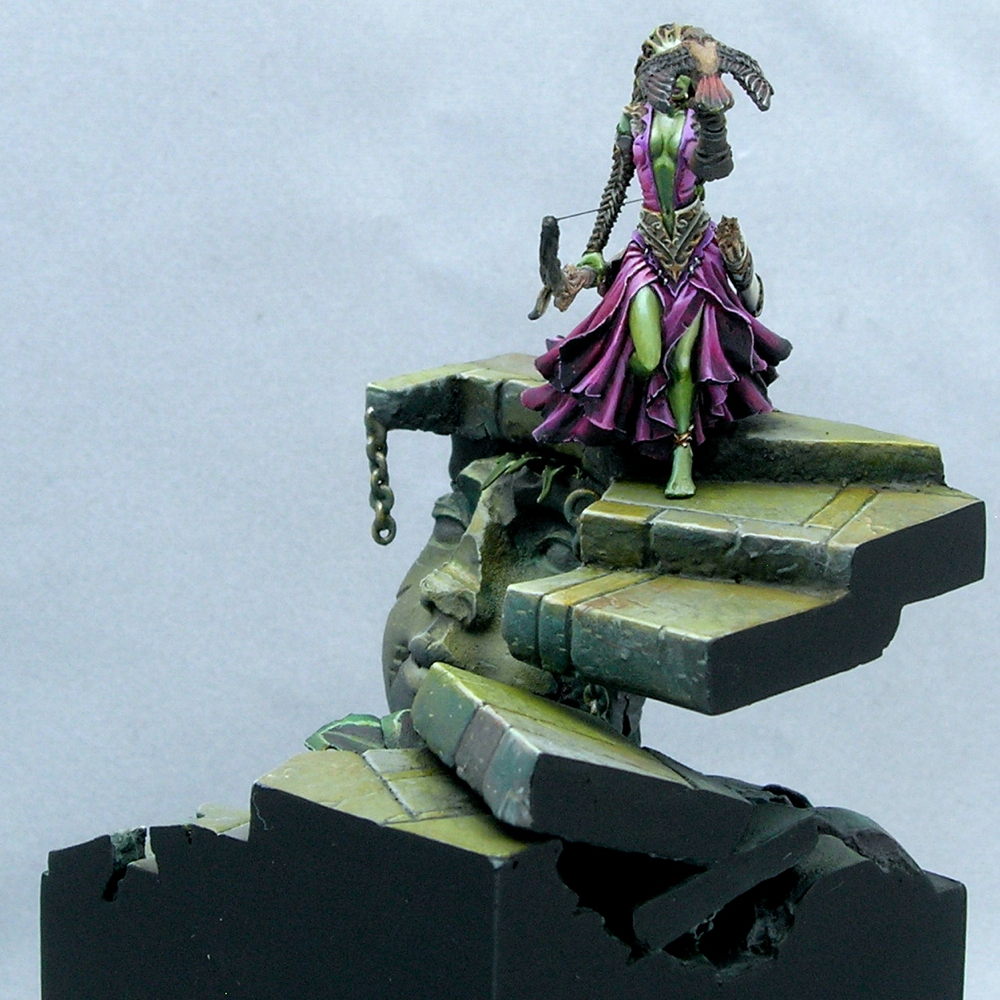
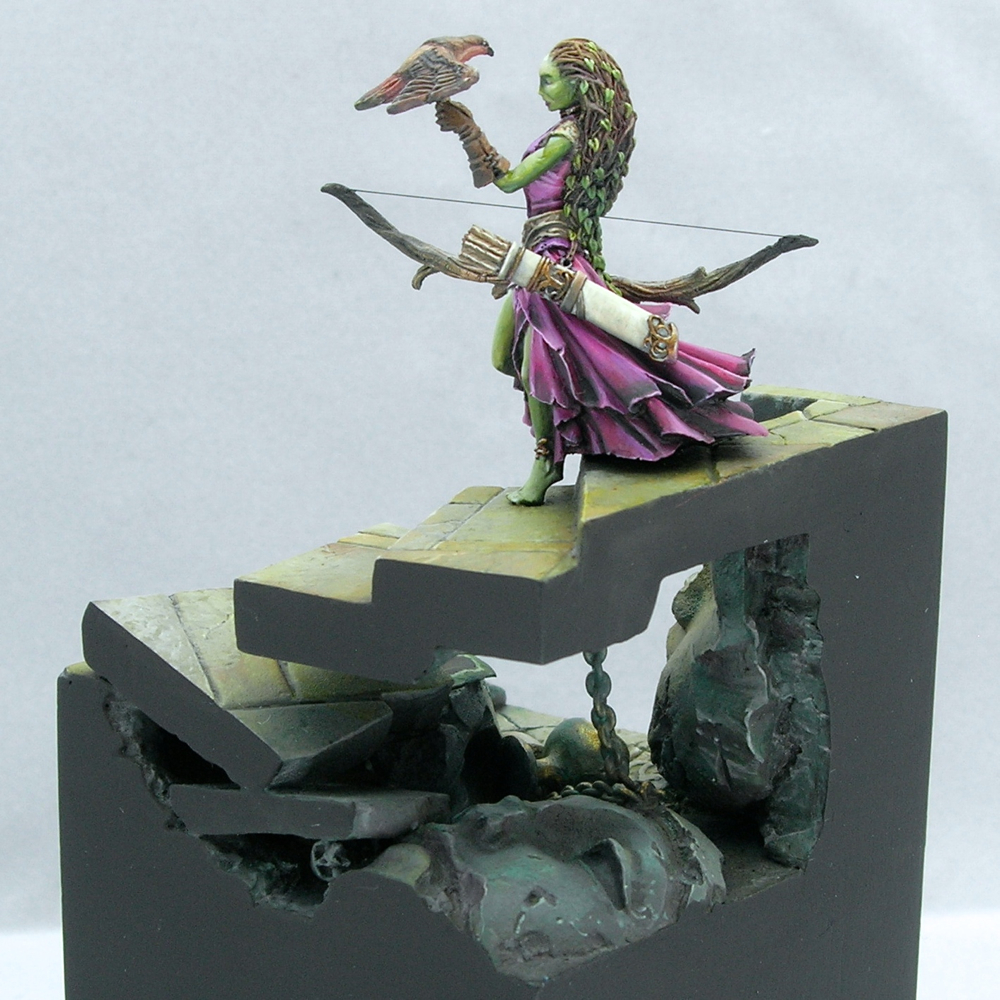
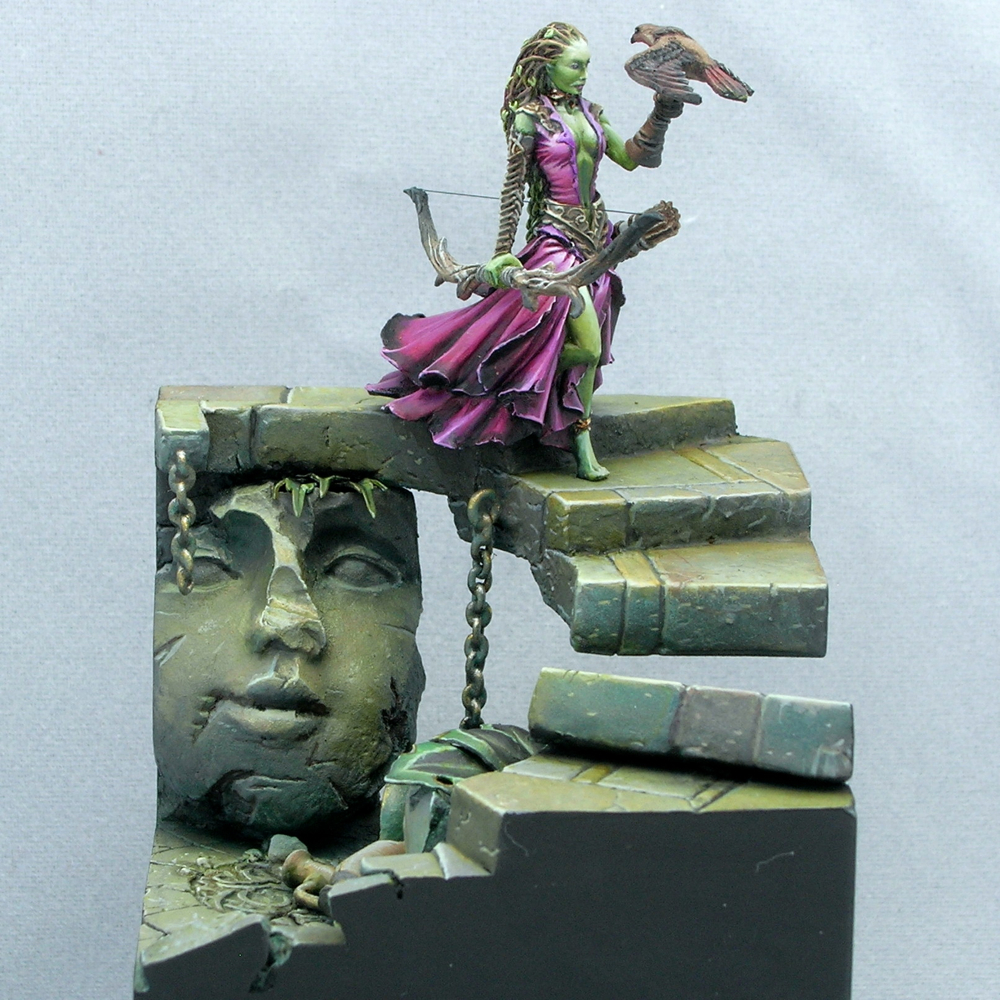
Here are some up-close views of the dryad.
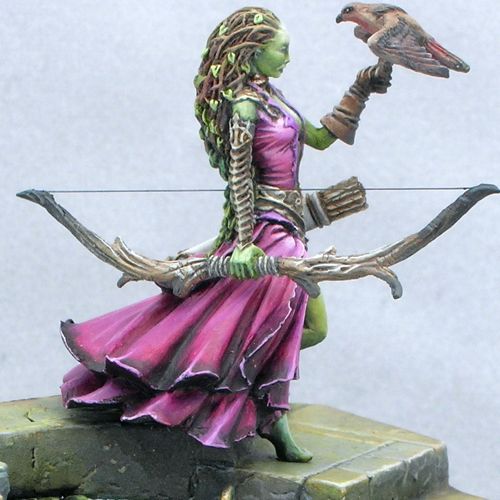
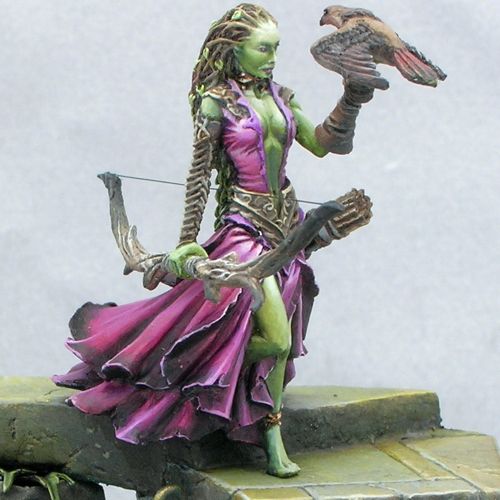
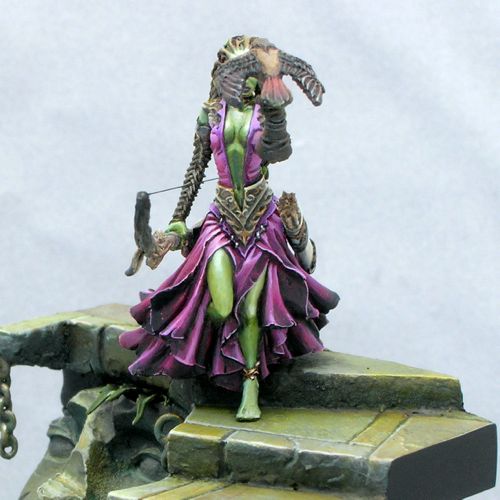
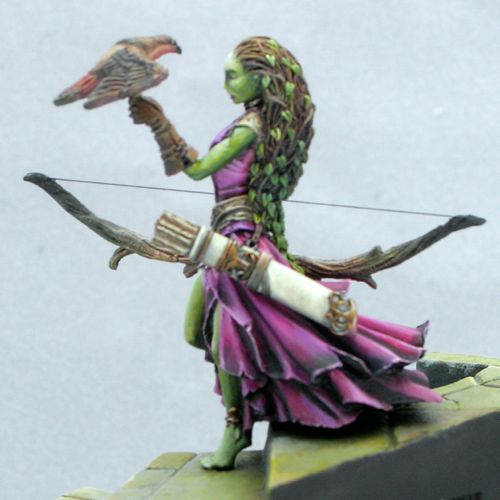

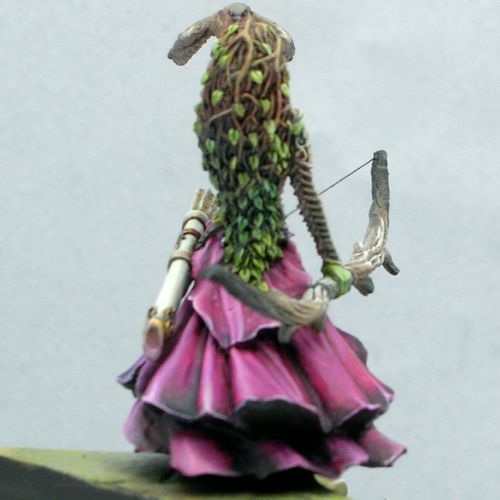
She placed 2nd in a hotly contested single figure category at Gen Con 2015.
You can also rate her on CoolMiniOrNot.
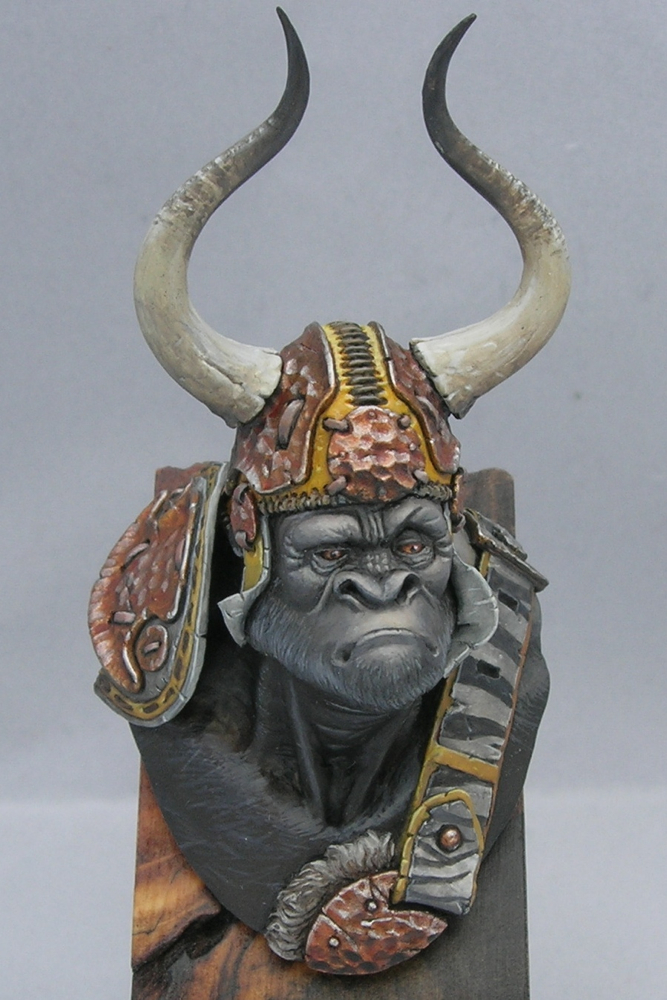
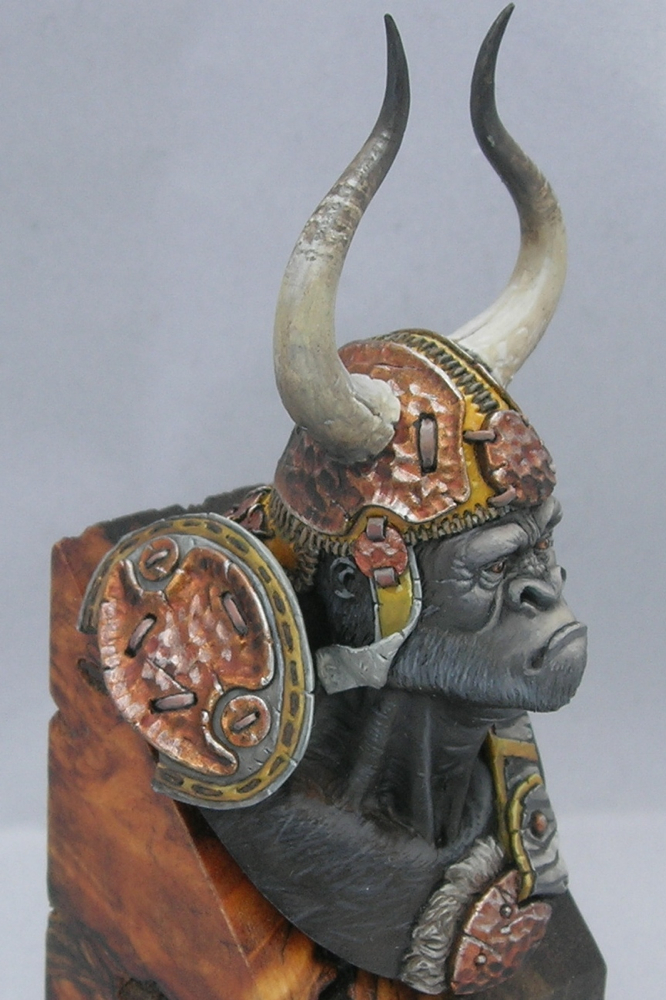
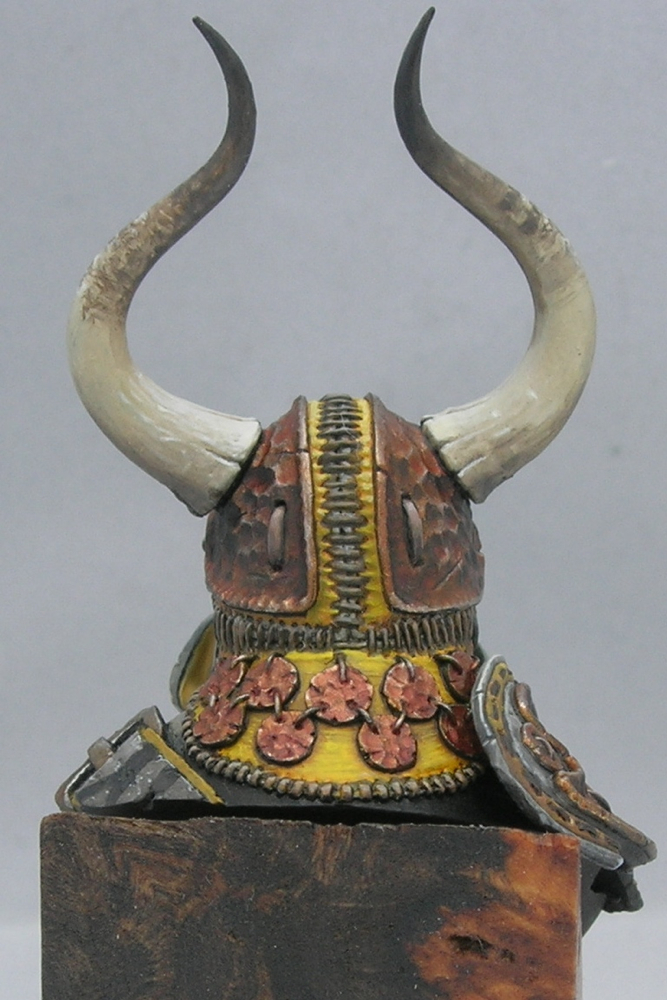
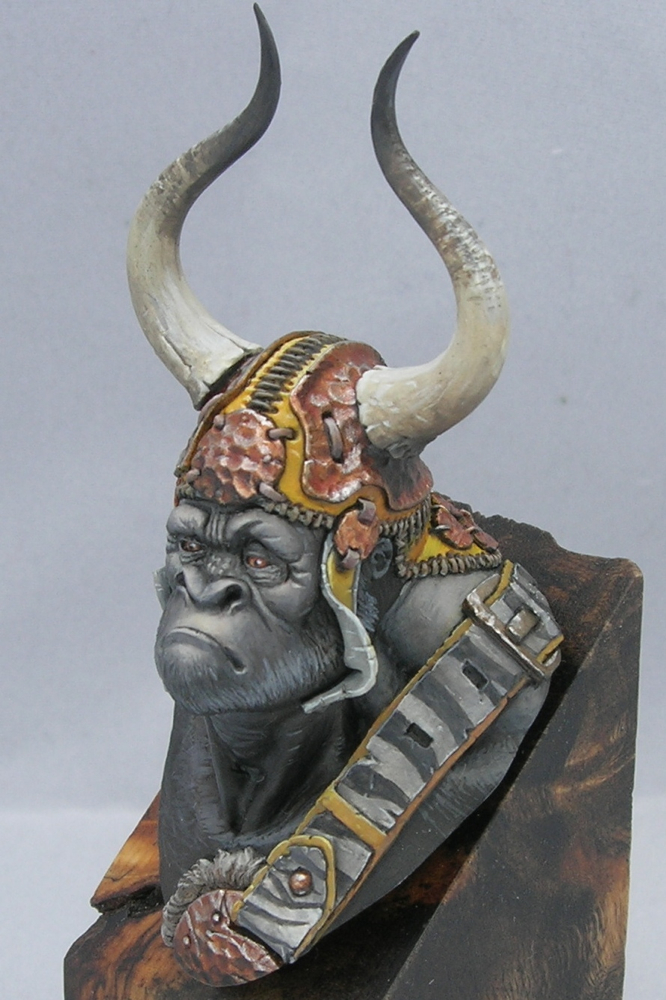
I saw this Dark Age figure at Gen Con, and just had to have it.
It’s a lovely resin figure, which makes me very happy. Unfortunately the pieces don’t fit together quite as nicely as some of the resin figures I’ve had the pleasure of working with, so I had to do a bit of green-stuff work to hide the joins.
The blue metals on the one side are close to finished, but everything else is (obviously) still very WIP. I’m really happy with how the metals are coming out. I’ve been shading my blues with red a lot lately. It’s only barely visible in these photos, but in real life I think it adds a lot of energy to them. I usually start by adding black to the mix to desaturate the blues, which aids the transition, and then add red or glaze with pure red in the deepest shadows. The result is clearly blue shaded with red this way, rather than looking purple.
According to traditional color theory, blue and orange are complements, as are red and green, but according to more modern color theory, cyan and red are complements. Since my blue hue is close to cyan, and I’m countering it with a primary red, this color scheme is more in line with modern than traditional color theory. Maybe.
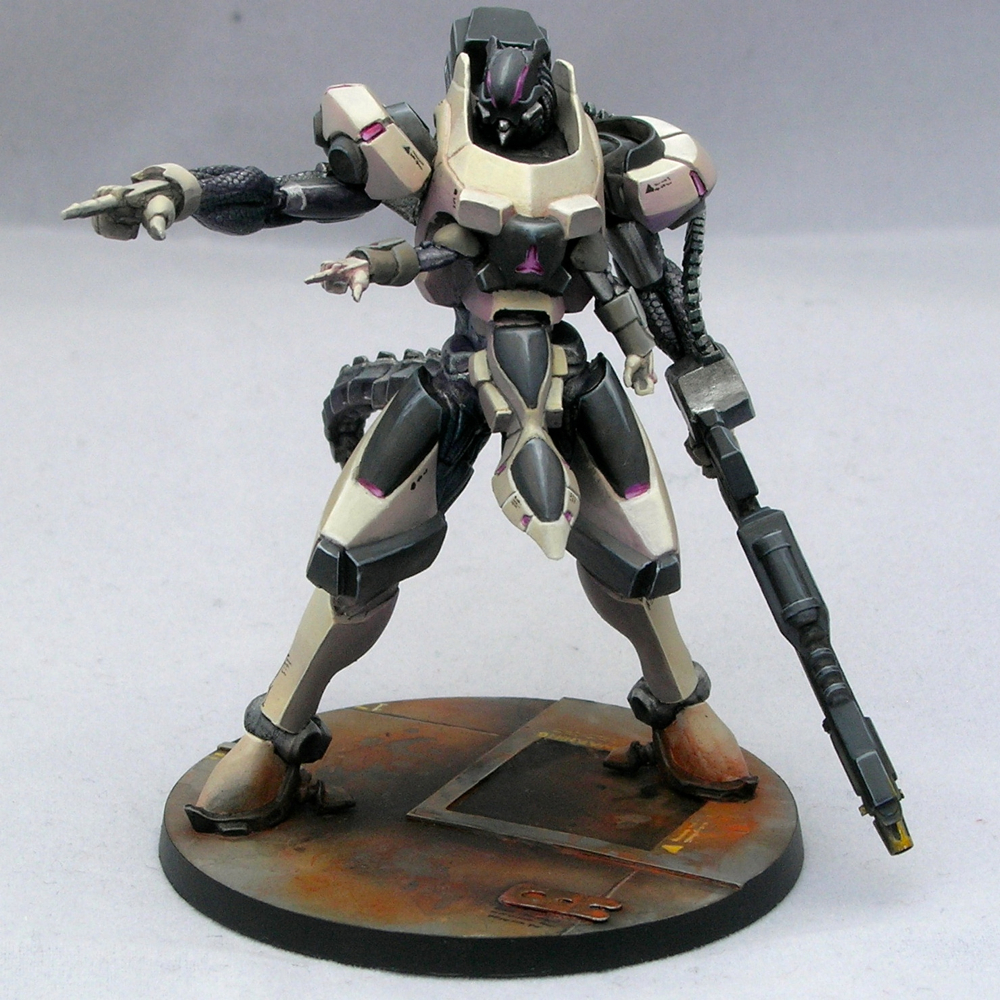
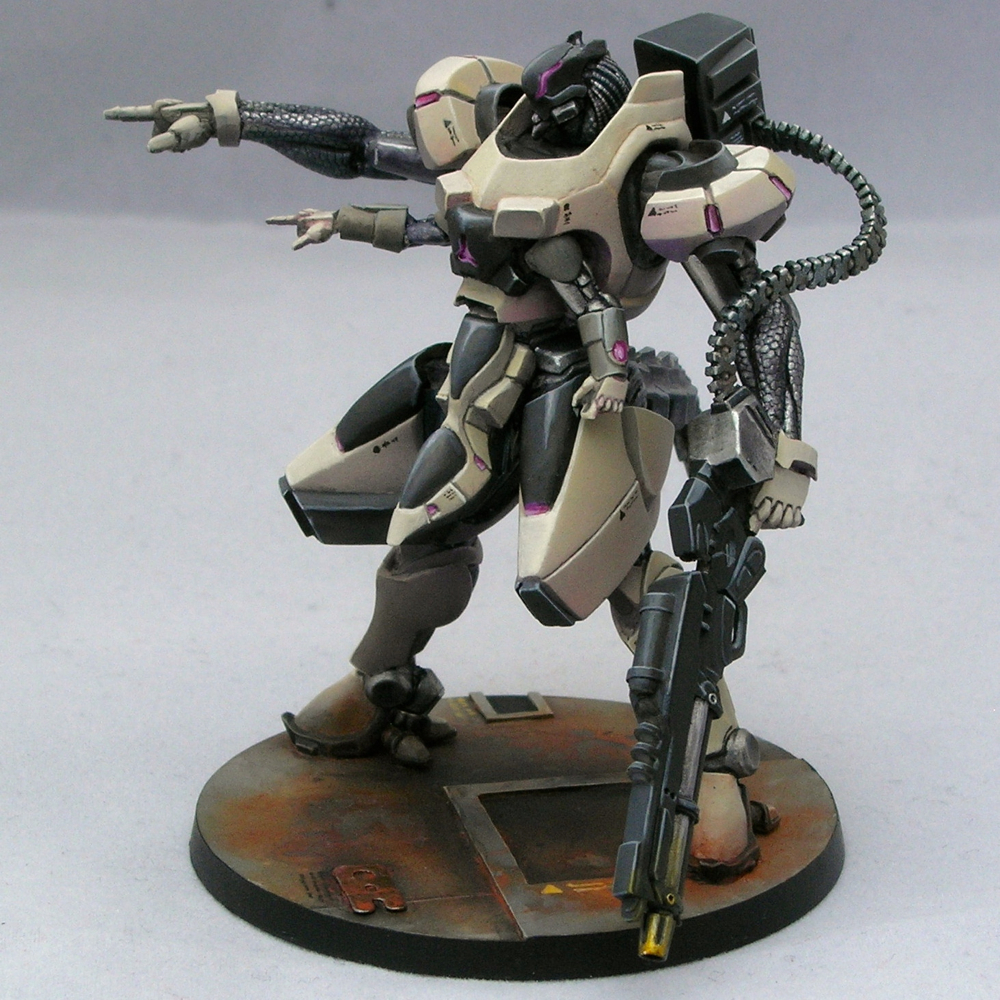
As soon as I saw the new Infinity—Combined Army starter pack in my local game store, I wanted to paint it. In fact, that was the box that ended up getting me started on my recent Infinity kick. I have to say the models are fantastic, light-years ahead of the older Infinity models; they are very easy to clean, and tremendously fun to paint.
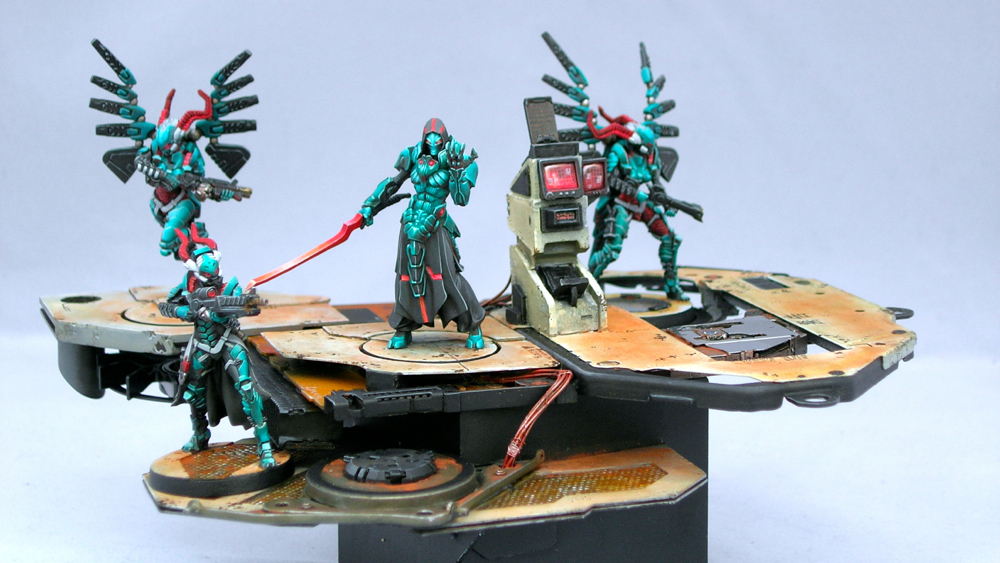
The base was the first thing I built, and is primarily composed of parts of the optical drive and heat sink from my old MacBook (which I replaced once it started constantly crashing), mounted on a resin block from Secret Weapon miniatures. The base presented some interesting engineering challenges, to make it structurally sound where a thin piece of plasticard was sticking out from a resin block and just attached at the edge, so I added some plasticard braces and carved a groove in the resin block for extra support.
The miniatures are all magnetized to the base, so that they can be removed to be usable as gaming pieces or just be appreciated on their own, but snap nicely onto the base in the appropriate position and orientation for group display. This was especially nice for entering into the Gen Con competition, which requires units to be presented together on a display base. Making everything nice and stable as a unit also makes things safer when being handled by the judges and their minions.
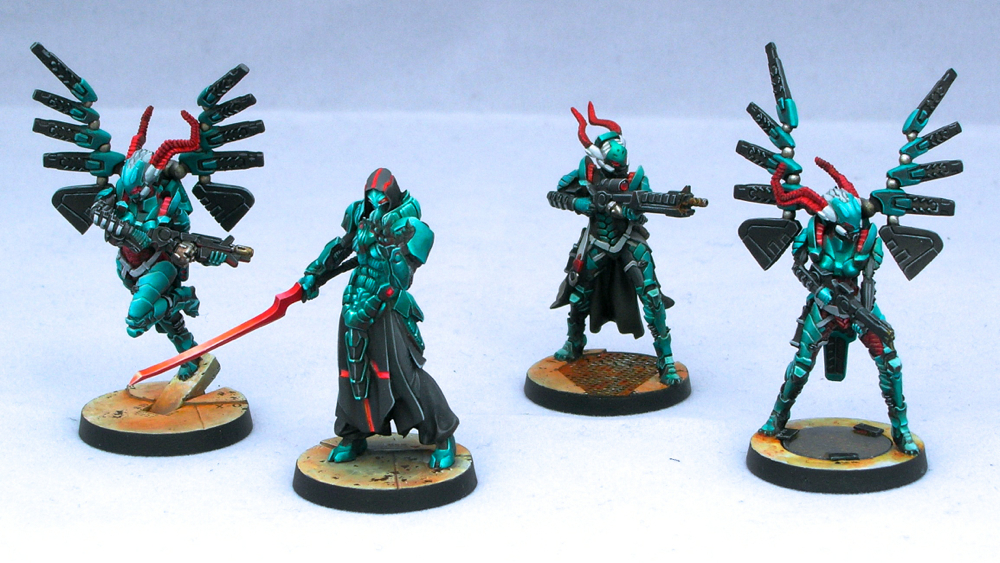
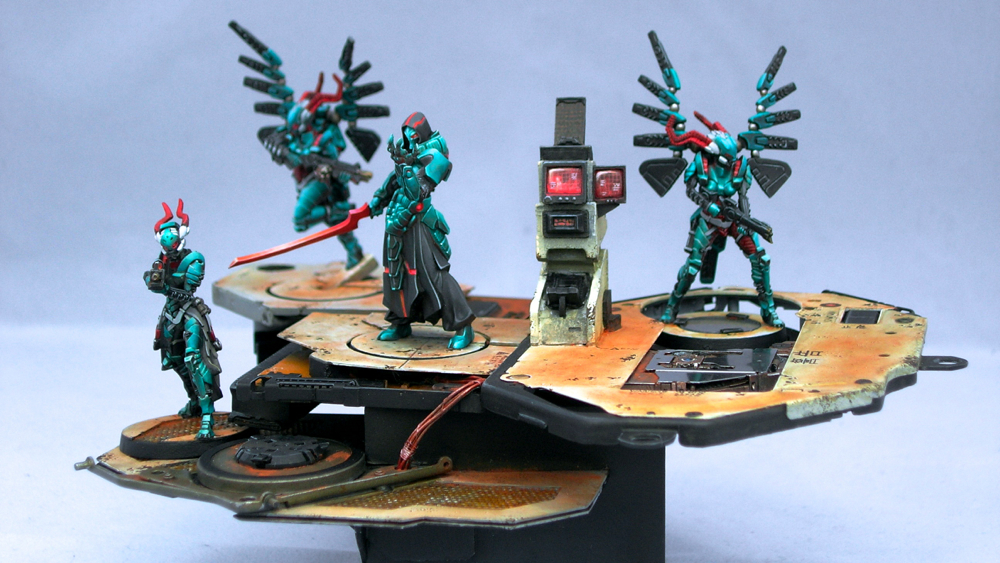
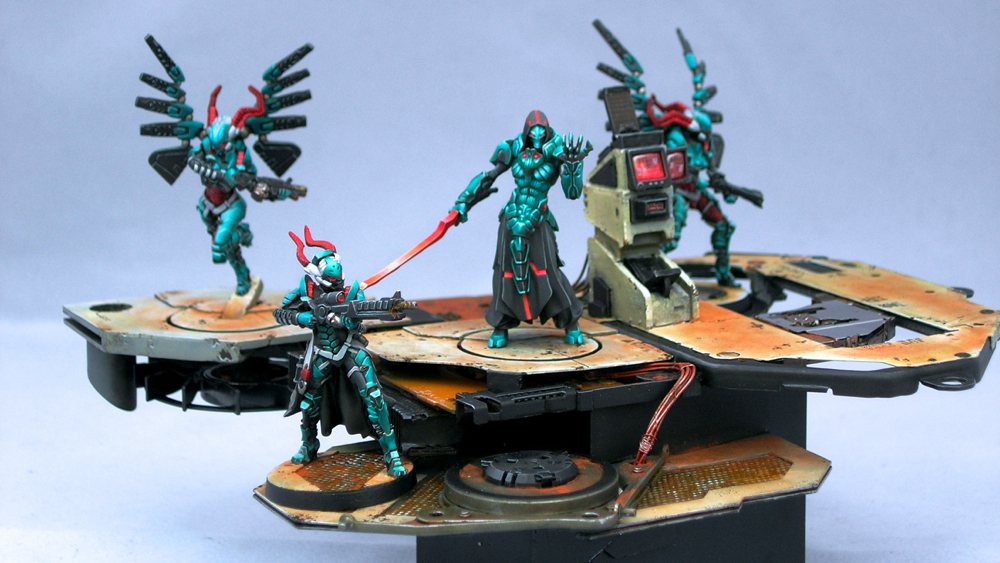
From left to right: Fraacta, Umbra Legates, Maakrep, Fraacta.

Originally I intended to paint the entire box up as a unit, but ended up dropping the Unidrons and adding an extra Fraacta. The base I built was not really large enough for six models, I wasn’t really happy with the first Unidron I painted up, and I really liked the new Fraacta model that had just come out.

The running Fraacta was the last model I painted, and turned out the best because I had the color scheme down at that point. In the sculpt, the Fraacta is jumping off of some weird, pseudo-organic piece of rock. In order to make it match the base, I had to completely resculpt that rock to look mechanical, and then incorporate it into the base in such a way that it looked at least plausible for it to be mounted at that angle. I ended up cutting a big hole in the base to make it look like a part which could be rotated out to provide access to something underneath.
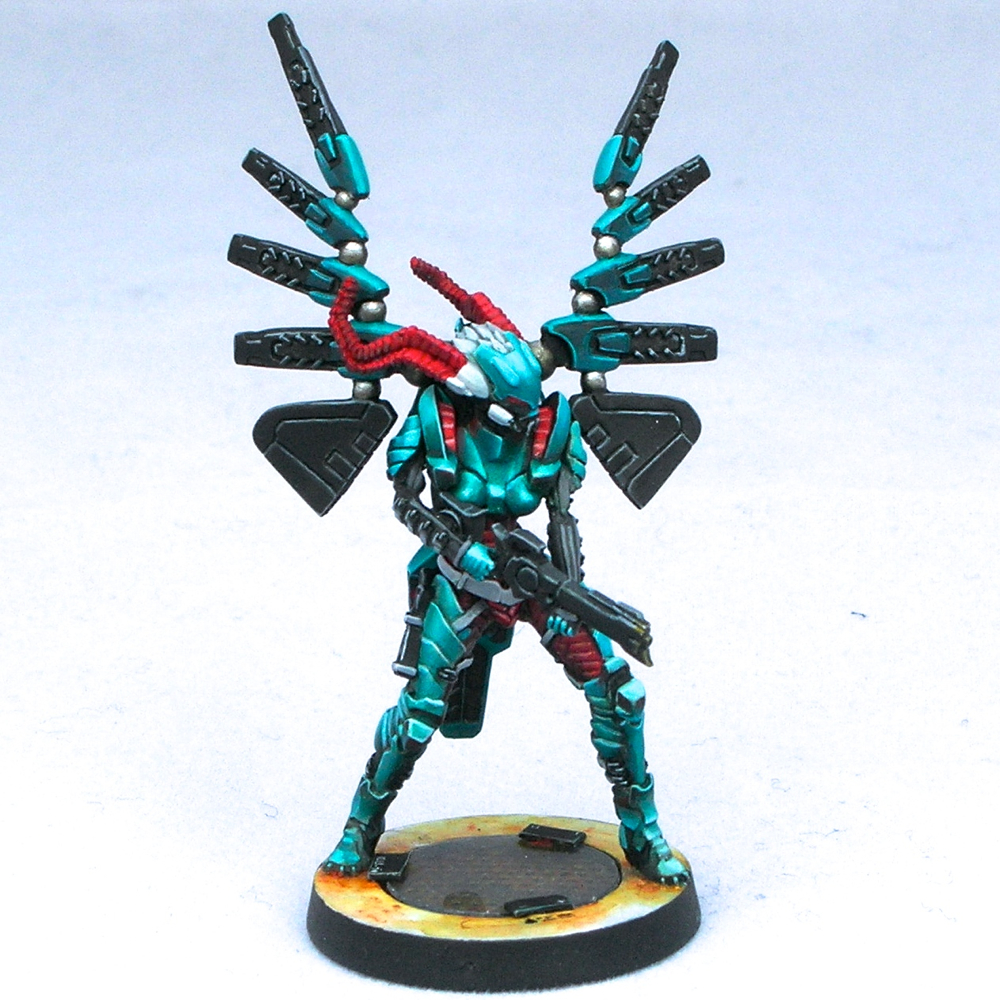
It’s hard to appreciate from the photos, but three of the four models have holes going all of the way through the bases. My favorite is the base of the standing Fraacta, where I carved out a circle from the middle of the base, and mounted a brass-etch grate and a clear piece of plastic (from a blister pack). I think incorporating negative space into most of the miniatures’ bases as well as the group display base makes them hang together really well as a unit.
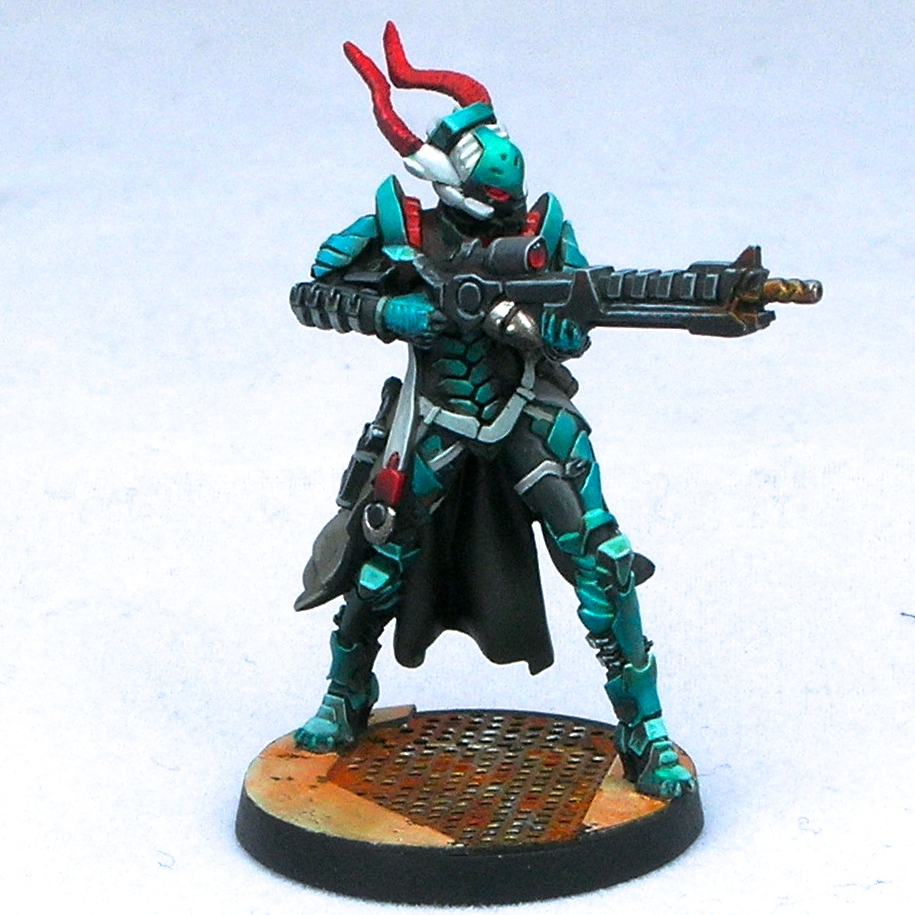
The Maakrep was the first miniature I painted of the group, and ended up much greener than the others. I painted the standing Fraacta second, and that was when I really nailed the color scheme down. I ended up having to go back to the Maakrep and add a lot of turquoise glazes so that the colors would match.
This piece won first place in the unit category of the Gen Con painting competition, and was awarded a gold under their open judging format. Additionally, Angel Giraldez, the studio painter for Infinity, was at the con, and told me that he really liked my entry, which was very flattering. Thanks Angel!
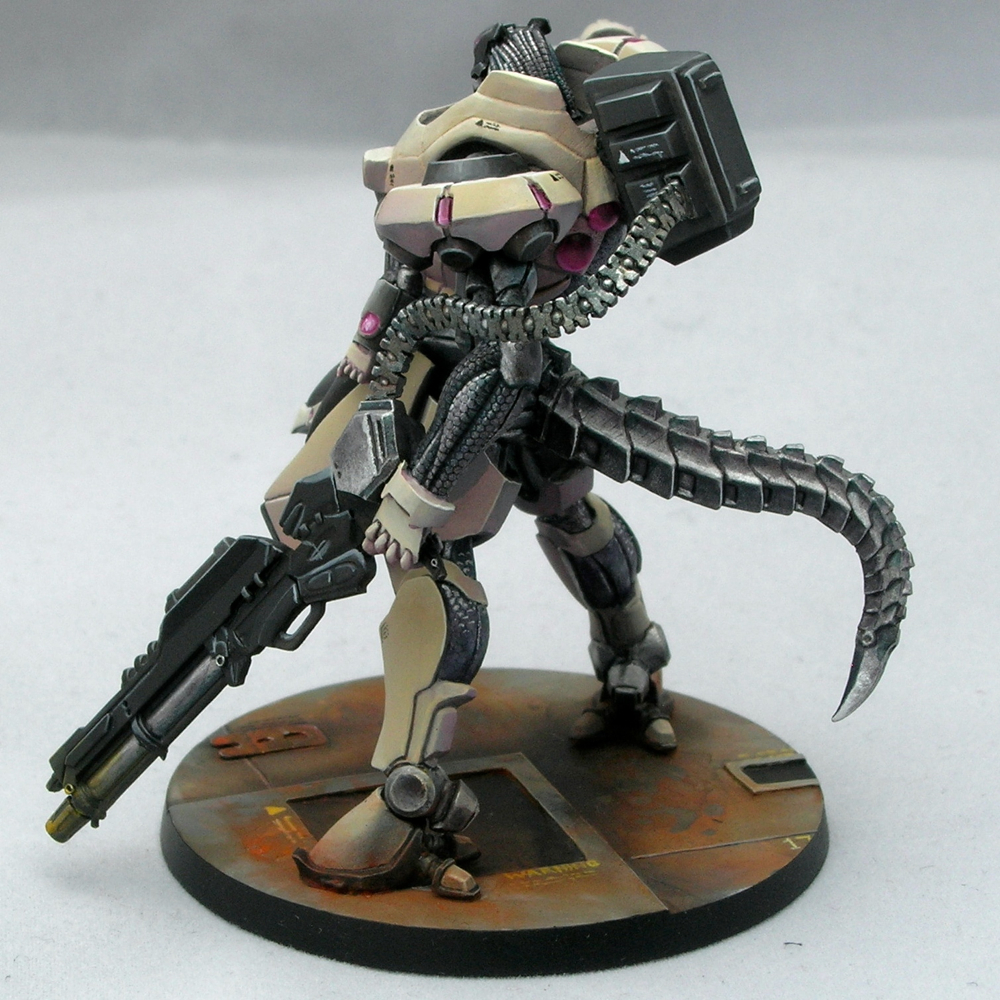
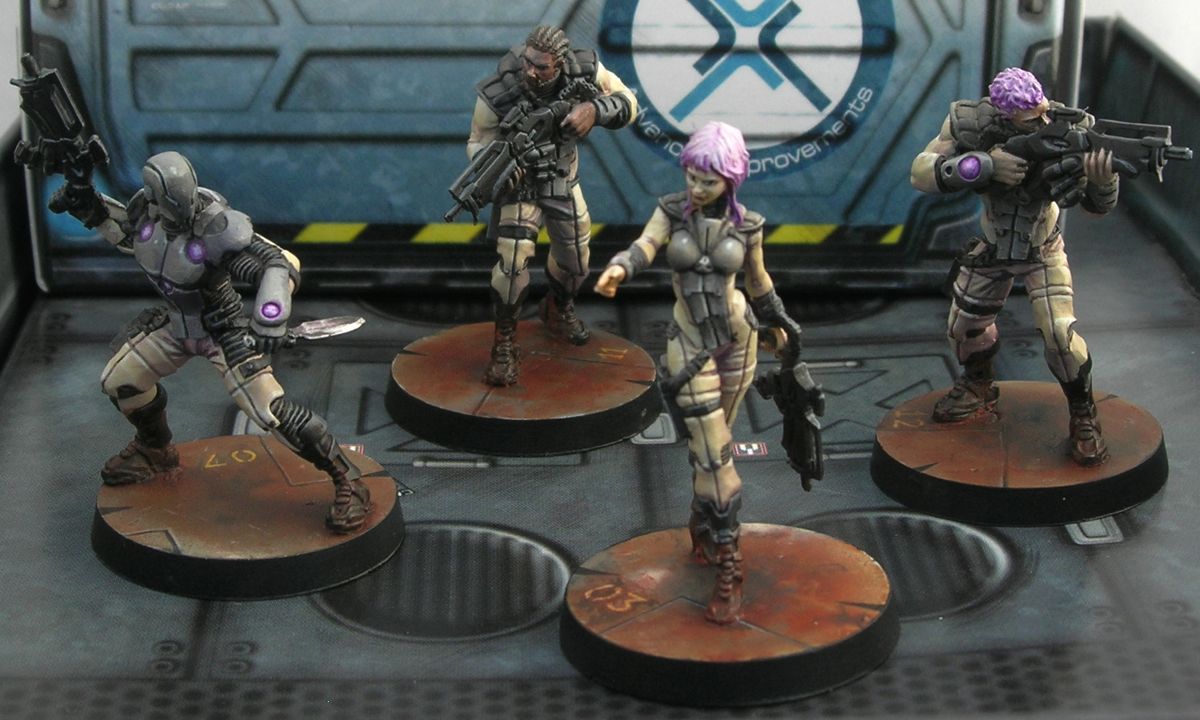
I painted a iguana to go along with my Nomad force. I decided to enter it in the “Machines of War” category at Gen Con, so I painted it to a somewhat higher standard than the other Nomads, which are just painted to a fast gaming standard.
I still took a lot of shortcuts though – for example, the blending on the black is not very smooth.
Like the other Nomads, this is painted in an Aleph color scheme (which confused a couple of people at Gen Con).
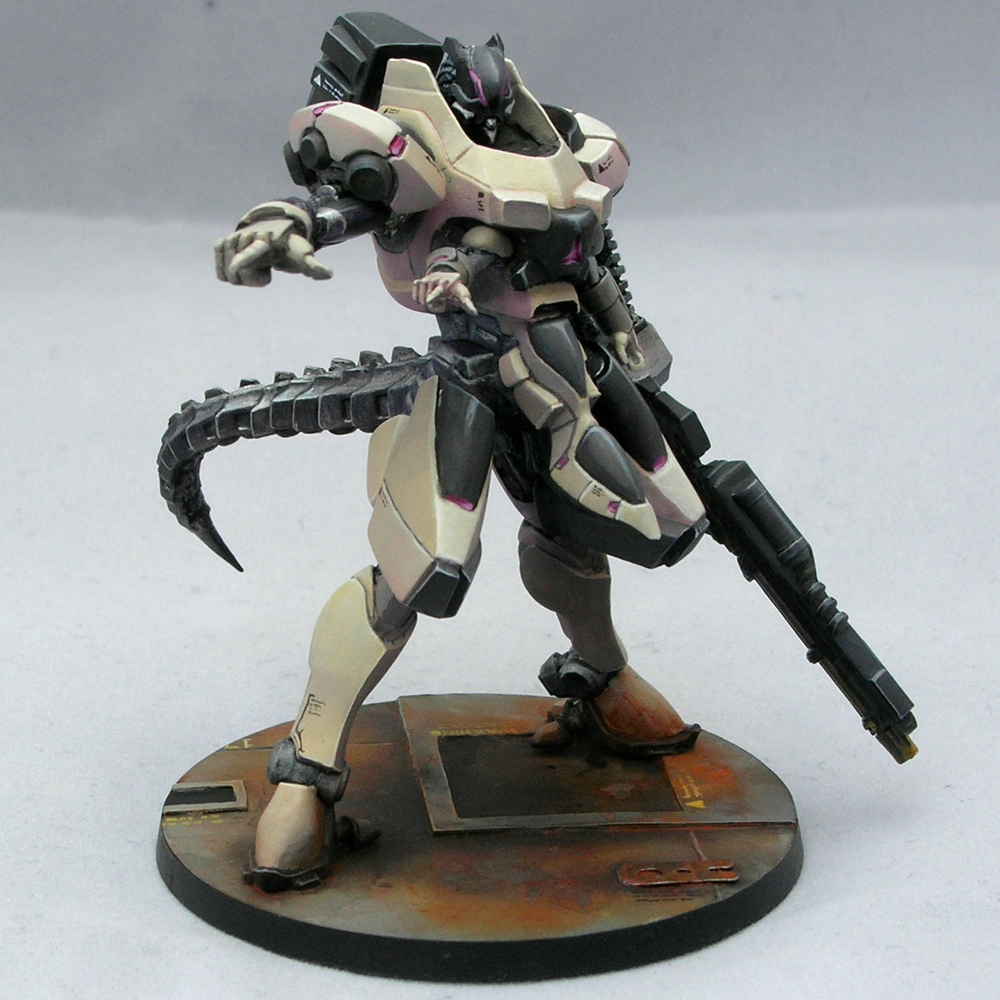
As an extra detail, I painted a lot of warning labels everywhere, sort of like you see on fighter jets.
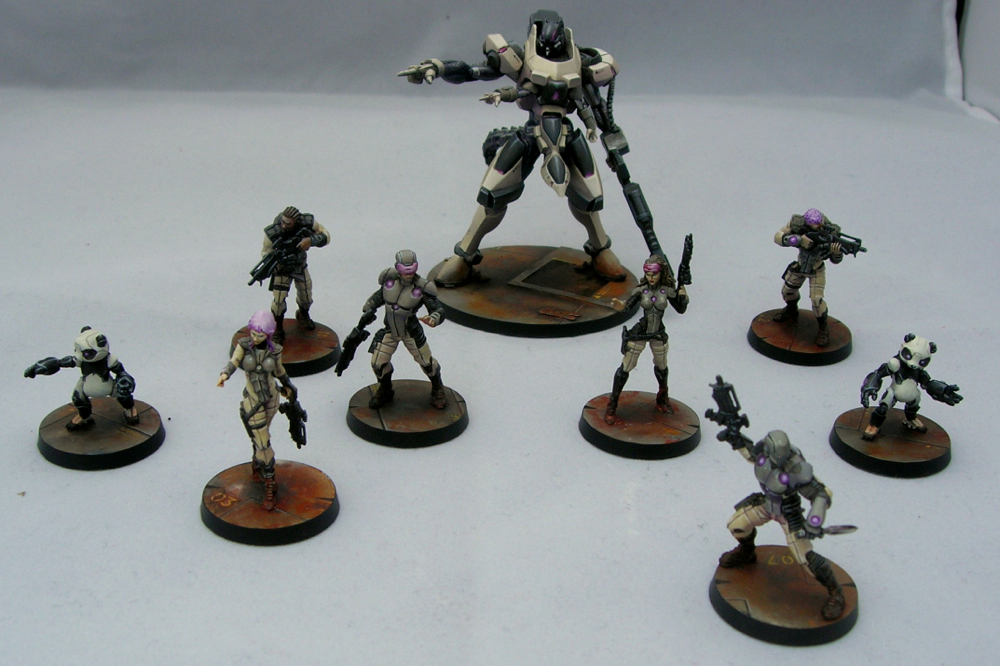
Here’s a group shot with my other Nomads.
My iguana was awarded a silver, and took first place in the “Machines of War” category.
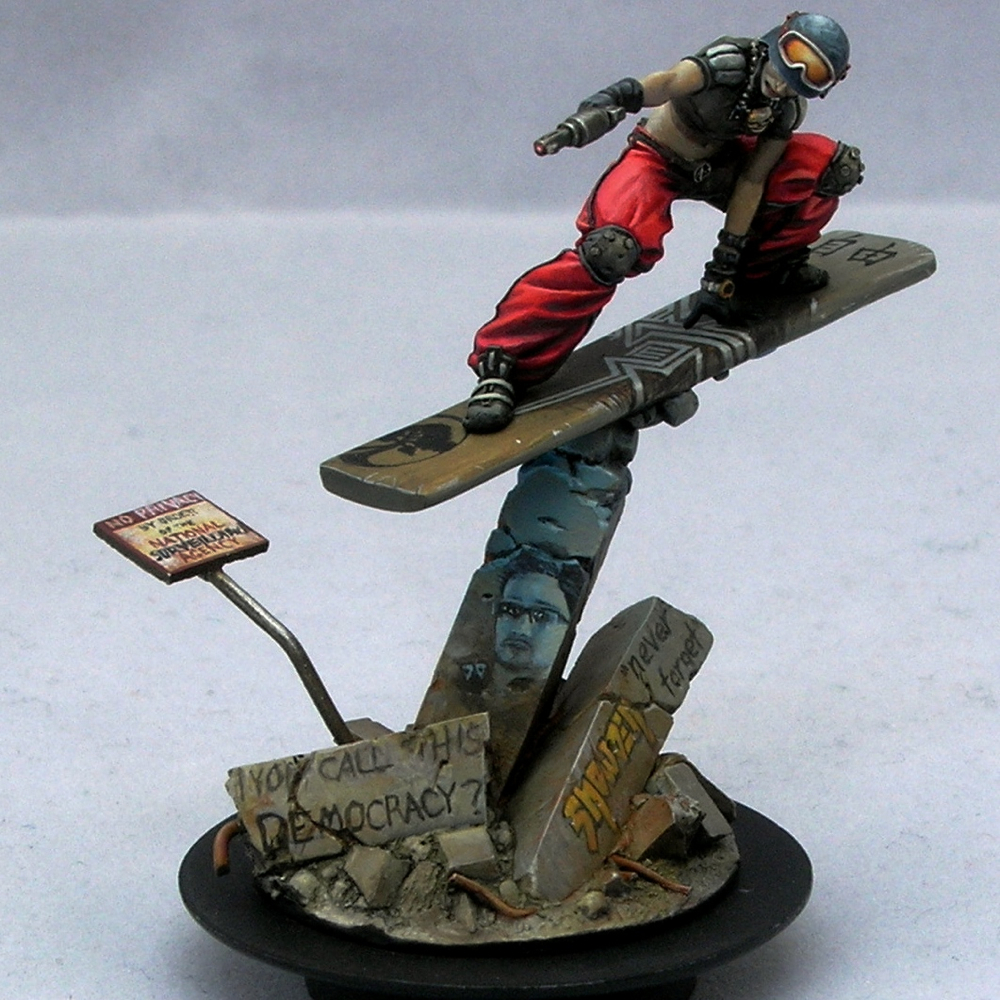
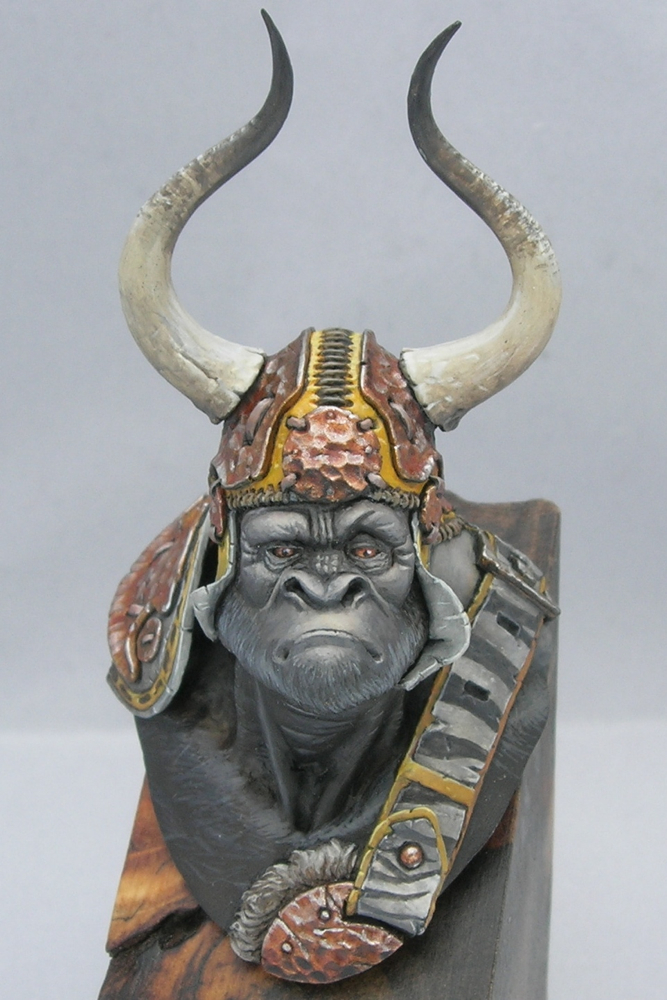
This figure by Studio McVey is so much fun to paint, I’ve painted it twice.
Some of the pictures came out better than others. I really need to improve my photography skills. But I think you can get the idea.
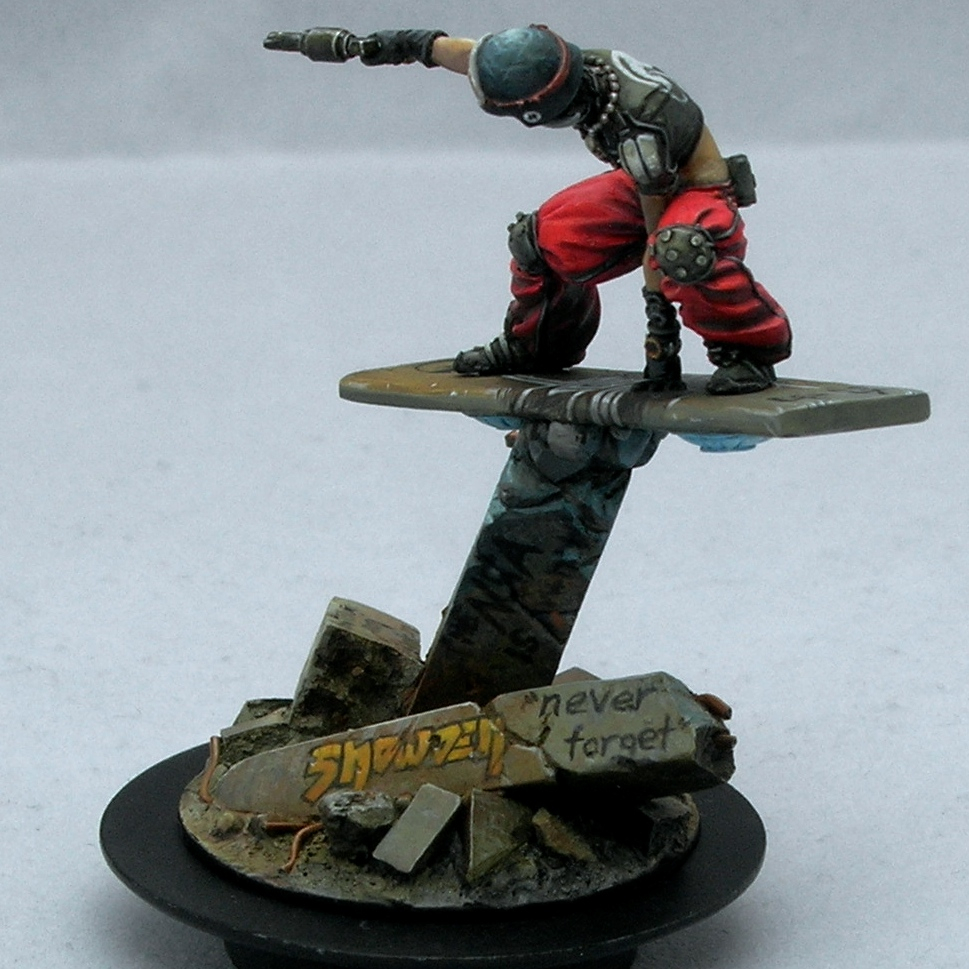

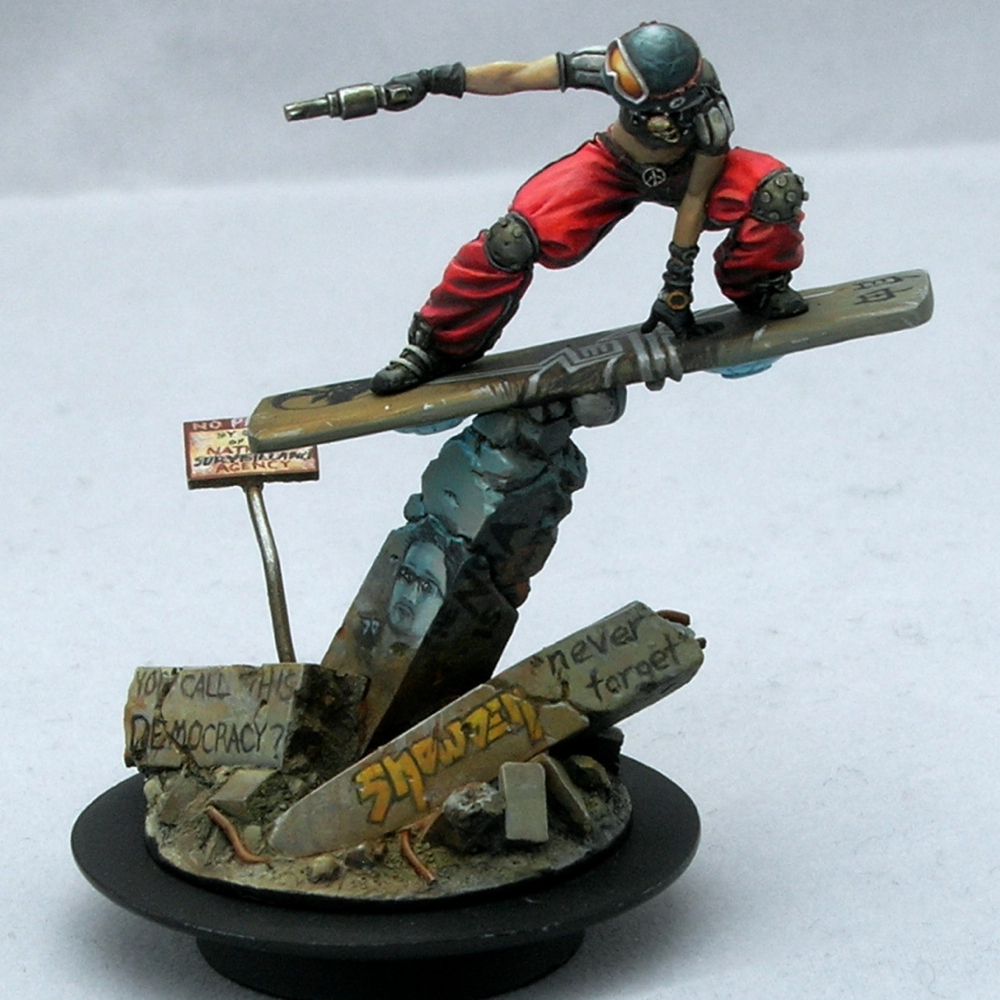
I had so much fun with the graffiti. I discussed what it all means in my WIP blog post about the base, in case you missed that one. Some of it is quite obvious, but other bits are more niche references.
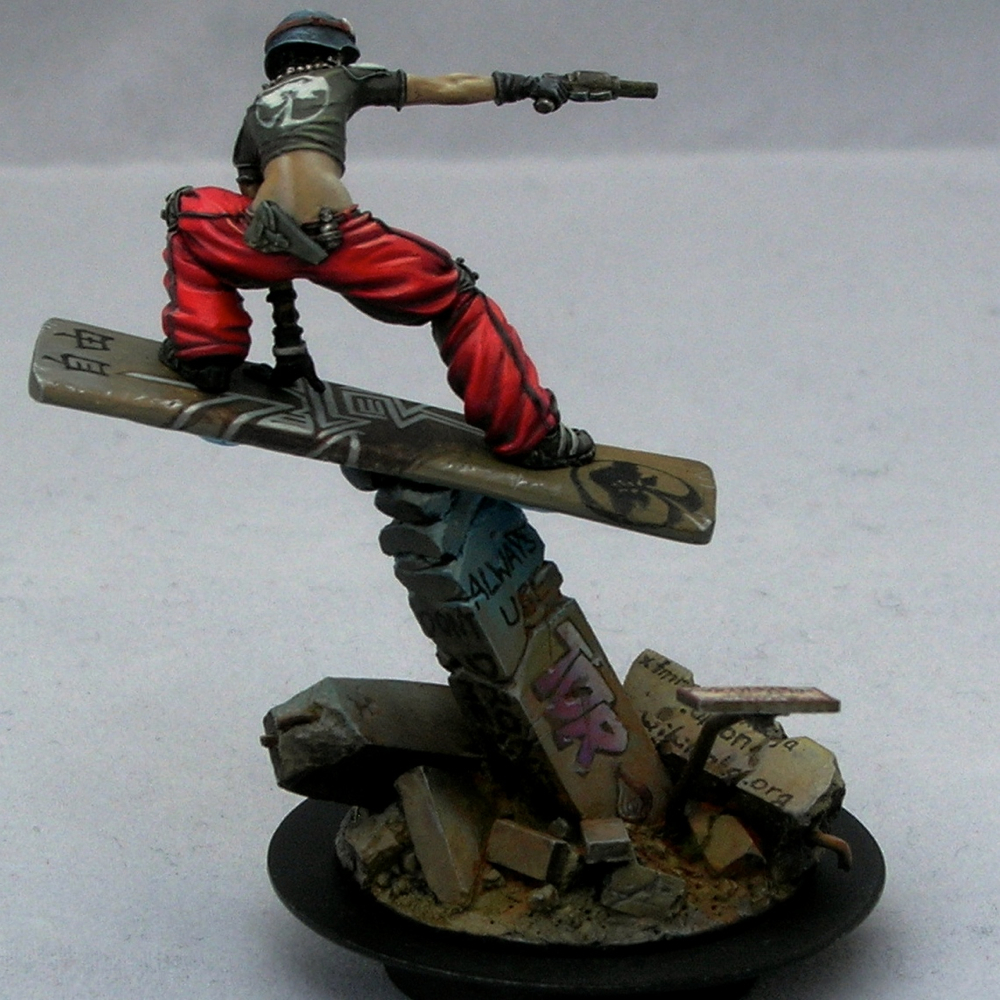
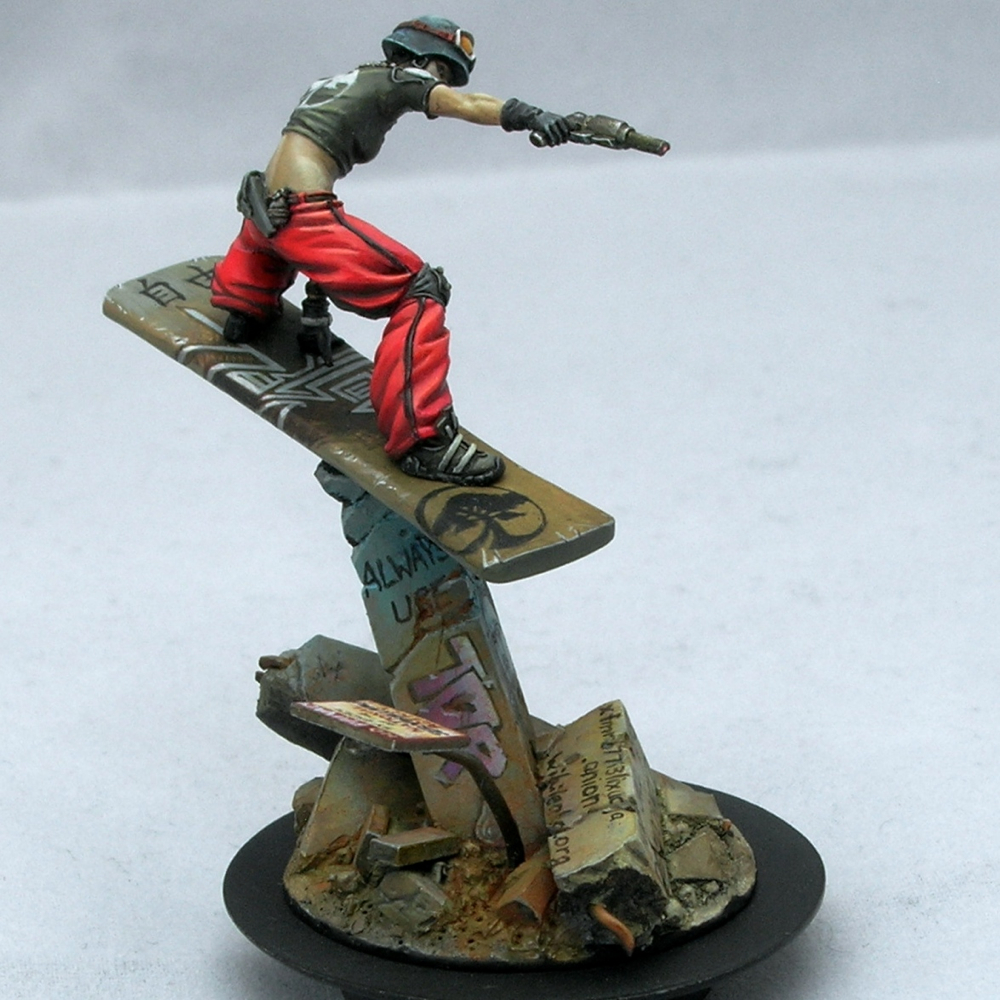
Painting the hoverboard was also a lot of fun. One of the things that makes Lisbeth such a neat mini to paint is all of the different surfaces that just cry out for freehand. The characters at the top read “freedom” (not that I can read Chinese).
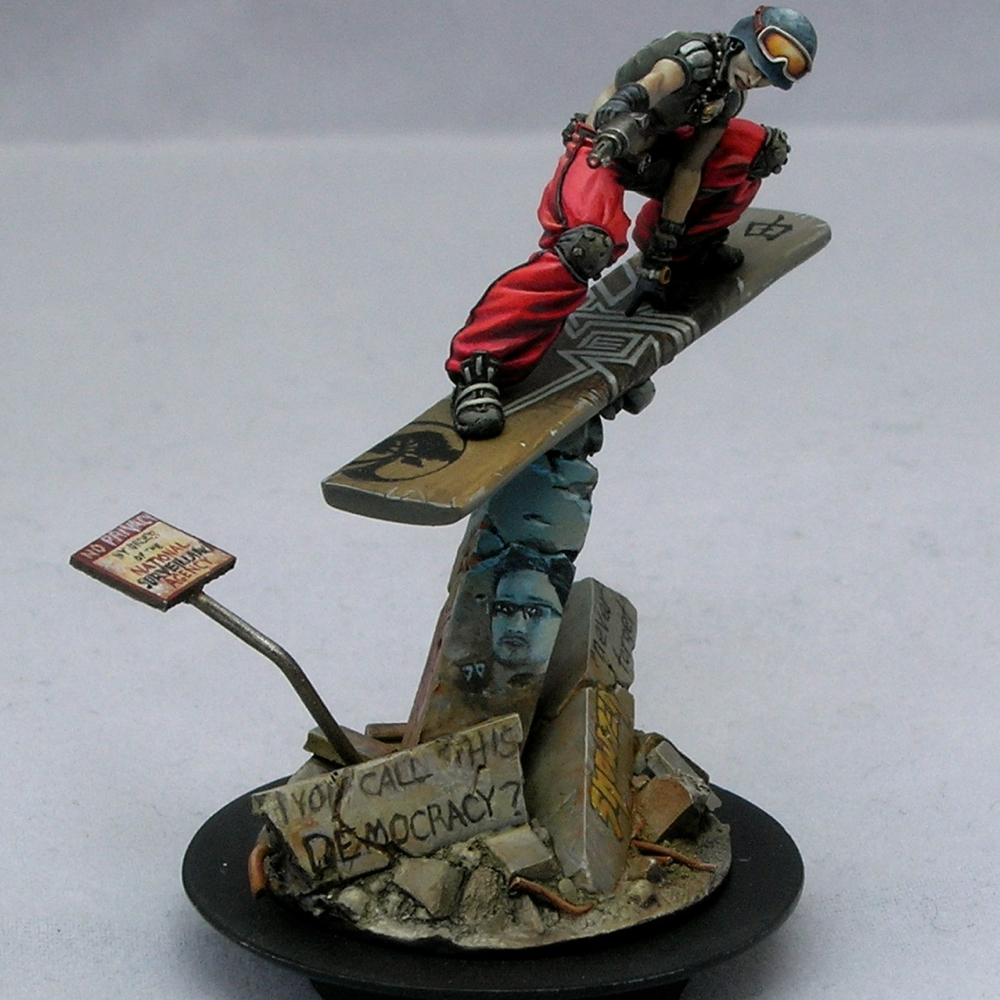
The other thing I had fun with is different textures – weathered concrete, scuffed plastic helmet, aged sign, scratches on the edges of the board. More and more I’m trying to convey textures when I paint minis. Sometimes it comes out great, but others not so well. But that’s always how it goes!
This was one of the pieces I entered in the Gen Con mini painting competition, which is why I waited so long to post it. It placed third for technical merit in the “Rainbow Brush” contest that Marike organized in response to Indiana’s terrible anti-gay “religious freedom” bill, and won a judge’s award and a bronze in the single figure category.
My final Gen Con project nears completion!
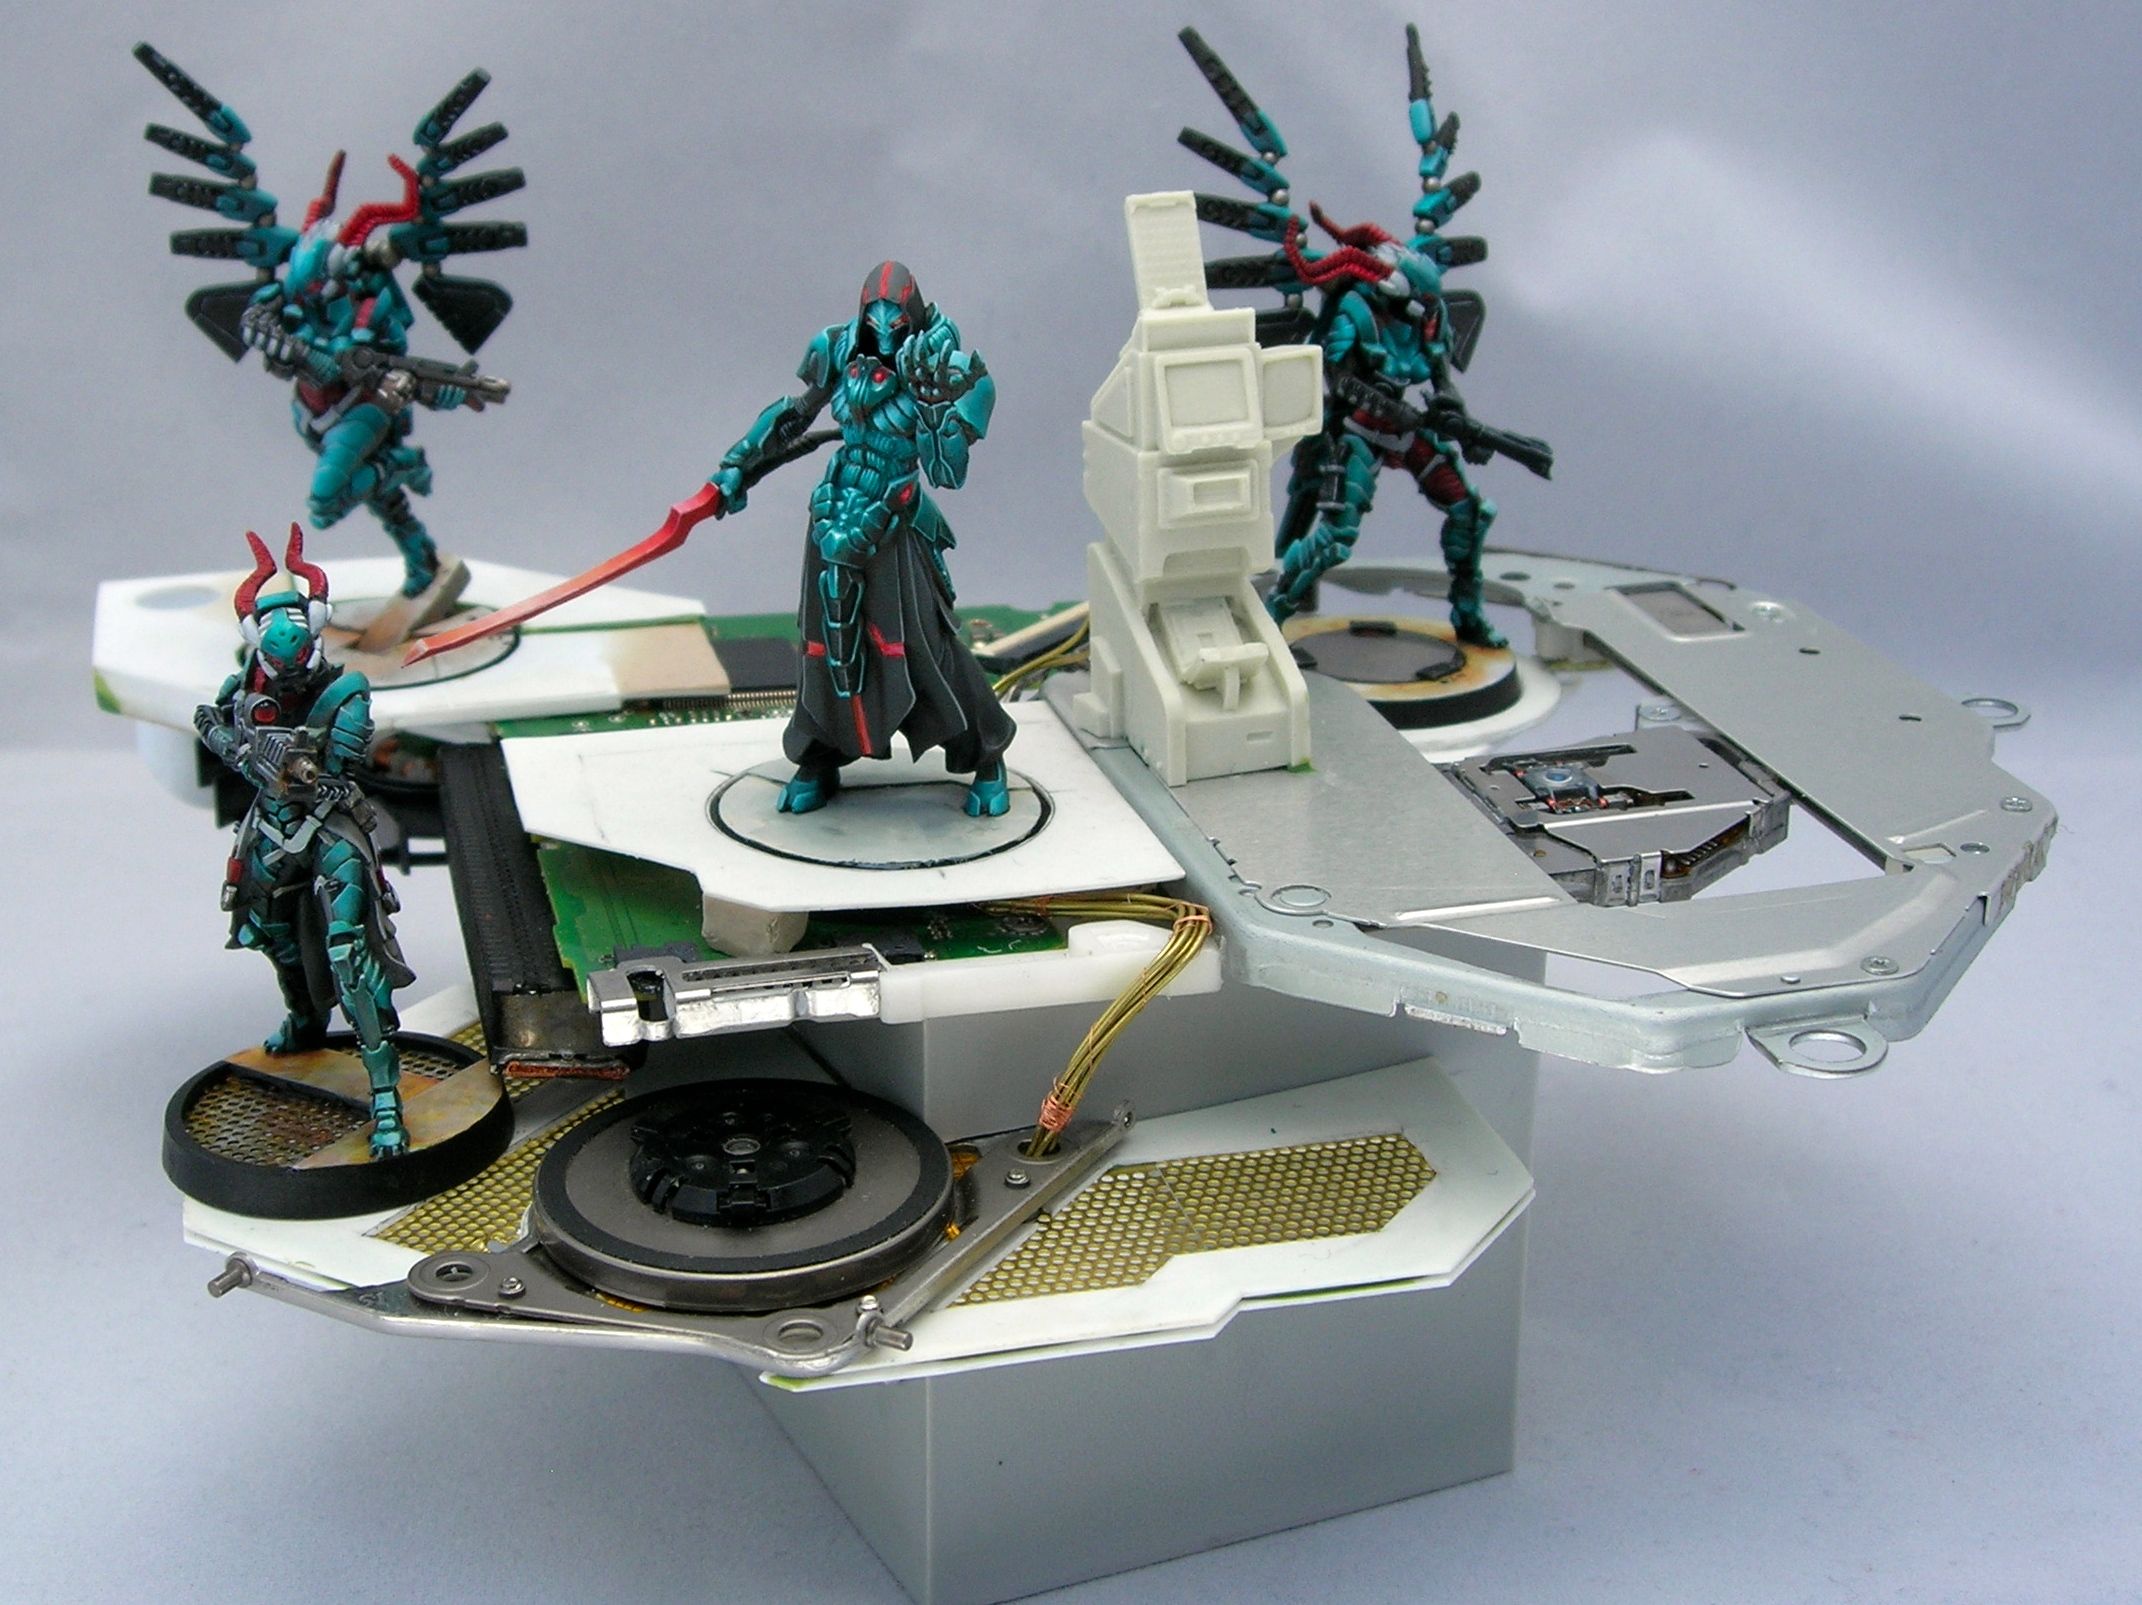
I’m calling it “Negative Space” because, in addition to the obvious art reference, it sounds like some kind of spatial anomaly – very appropriate for a sci-fi scene. The figures are 90% finished; the base still needs to be painted. The main base components are from a laptop optical drive and heat sink mounted on a secret weapon resin block (they make really nice handles for display bases), with your basic plasticard/wire/putty and a Micro Art Studio terminal.
Also, I wanted to apologize for being so quiet of late. I’ve been hard at work getting ready for Gen Con, but I’m holding off on posting my finished entries as I didn’t want to give up the element of surprise. Also, it’s always more fun to wow people in person. Sorry I’m such a tease. I promise to post lots of picture afterwards. You can probably guess what I’m entering: it’s basically everything from the workbench minus what I’ve already shown finished.
This will be my last post before Gen Con. I’m super excited, and I hope to see some of my blog readers either in the competition, in my classes, or just around the convention! I’ll also be doing some demos and volunteering a bit around the MHE area, so please come by and say “hi” if you’re there!
I picked up Operation: Icestorm a few days ago, and also one of the new Combined Army starters (which is amazing). The new Infinity models are so cool I had to pick some up. Light-years ahead of the older sculpts.
So far I’ve painted 4 nomads, and I’m about half way through the Maakrep sniper. I decided to really take my time on the Combined Army models, and do fast paint-jobs for the Operation: Icestorm minis. These figures are 2 hours of painting each, including basing but not counting prep time. I think that’s about my sweet spot for figures I can be proud to put on a table without taking a ton of time for each model. Two-brush blending for the win!
I only made a few changes since the last workbench post, the most significant being the addition of a plinth. This was done by a friend of mine, and it came out great. Thanks!
I managed much better photos this time, which is kind of amazing since I never take good photos. I’m still kind of shocked by how well they came out. So I did something I never do, which is upload really high res pictures. You can see all the brushstrokes!
I also entered him into the painting competition at KublaCon, and was thrilled to take home best in show, despite some other very nice stuff in the case. Now I have a cool dragon trophy.
Recent Comments