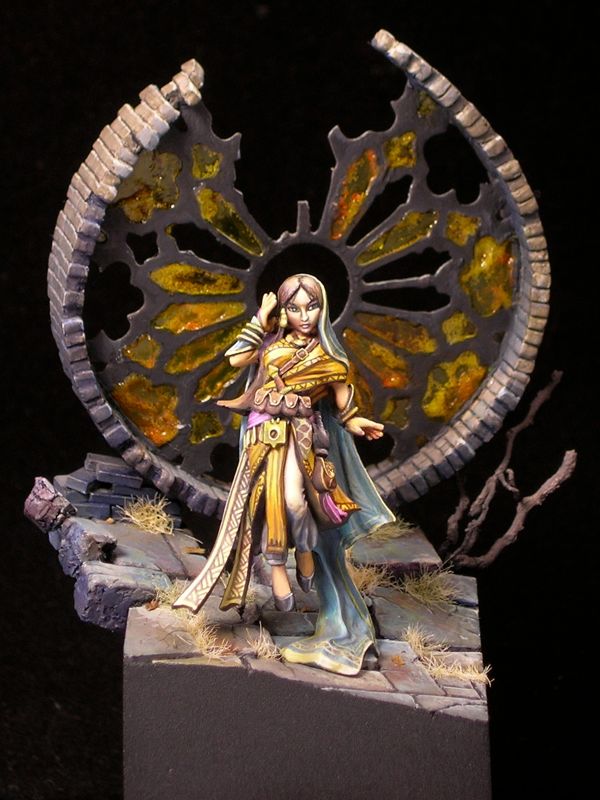
After I went for the first time last year, Reapercon immediately became my favorite convention to attend. It has a 100% miniatures focus, everyone is very friendly, and it is small enough that you can actually get to know a decent number of the attendees. Reaper is very welcoming of other manufacturers at their convention. Their painting contest is open to entries from any manufacturer and genre, and they have a number of awards for miniatures by other manufacturers, such as Dark Sword, Bombshell, and Scale 75. Nevertheless, I like to paint something by Reaper for the convention, partly to show my support, but mostly because they make some nice minis! Also, it makes you eligible to win Reaper Sophie trophies, which are pretty awesome. I chose to use Rivani, Iconic Psychic, sculpted by Bobby Jackson, for my entry this year.
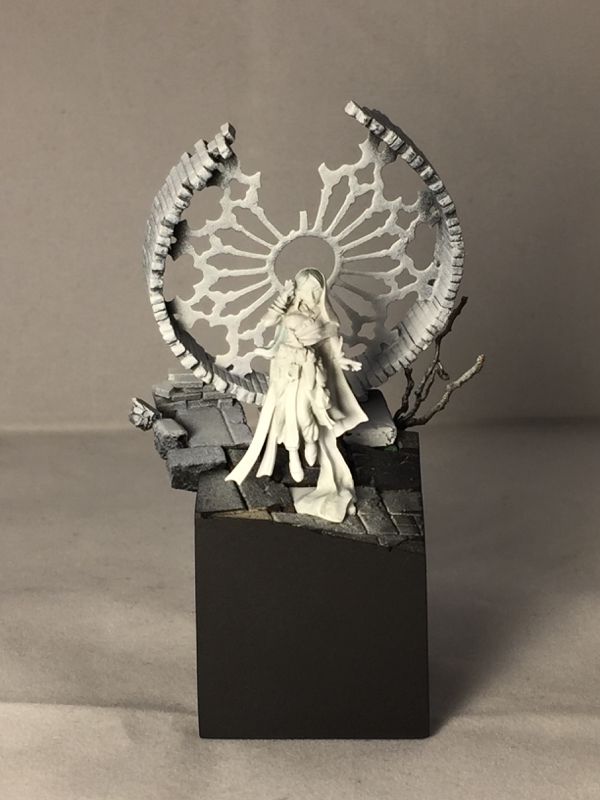
I like to start all of my miniatures by building the base, before I do any painting and often before I even start planning the painting. This allows me to do a lot of test fitting without handling a painted miniature (always a bad idea for competition pieces), and allows me to plan the lighting in the scene with both the miniature and base in mind, which is important.
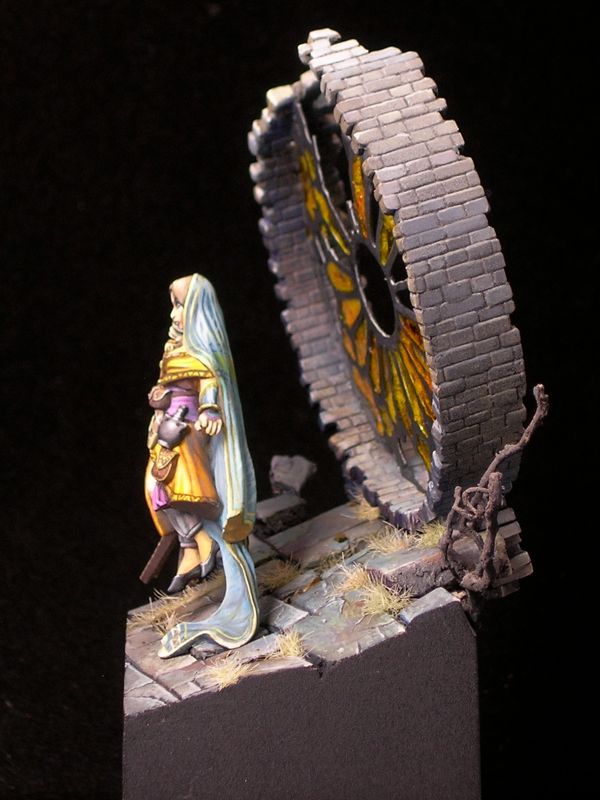
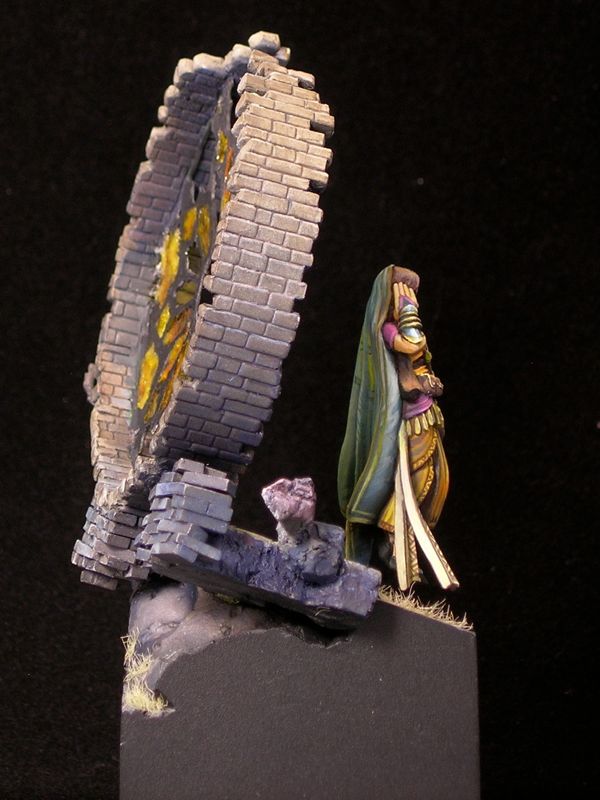
For me, bases are roughly equal parts composition and storytelling. I always start by thinking about what sort of story I want to tell. For Psychic, because the psychic herself is floating, I decided to emphasize that by building a base which feels like it is just hanging there, oblivious to the laws of physics. I built a ruined church, but consciously did it in a way that a real ruin could never happen. Large parts of the structure are missing, and yet the remaining parts somehow stick around exactly where they started even though they lack support.
Once I have my concept in mind, I start thinking about how to best convey that concept in miniature. This usually involves building components I think will be useful for that concept, and then testing out compositions with those components until I have something where the composition works, and the scene is sufficiently detailed and confined.
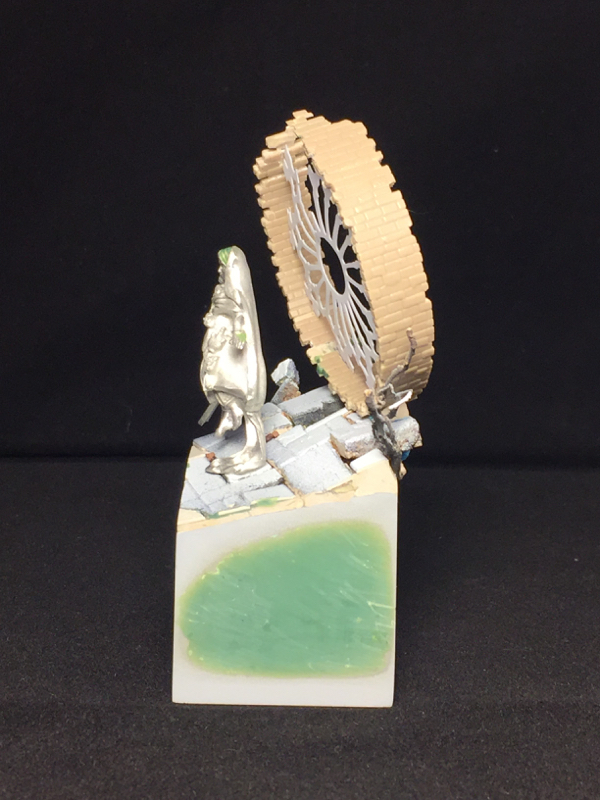
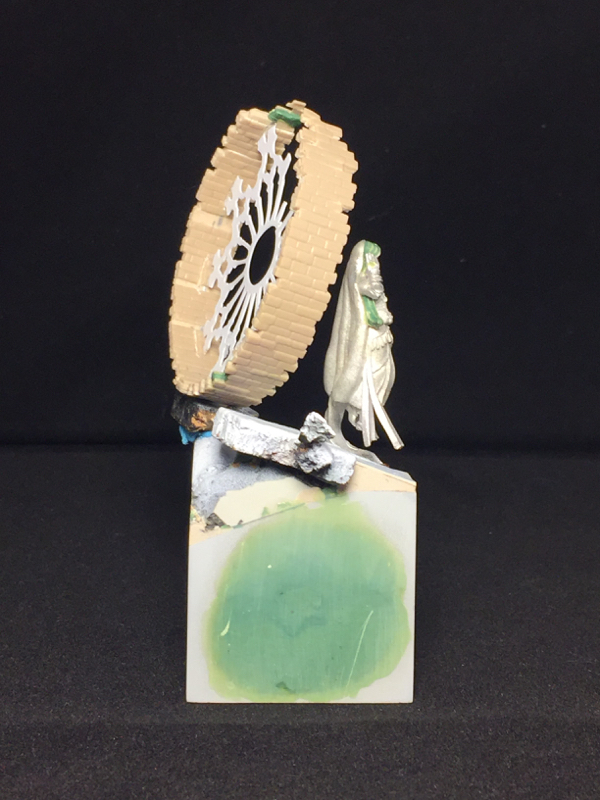
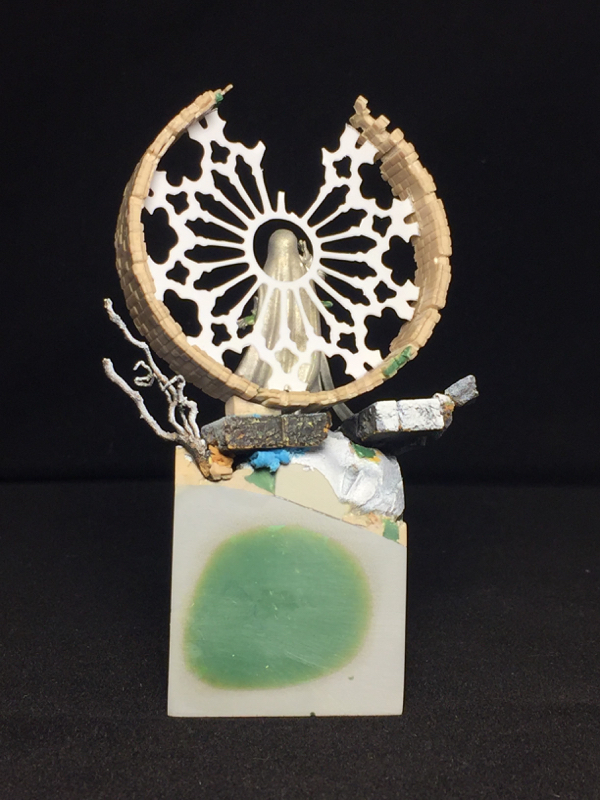
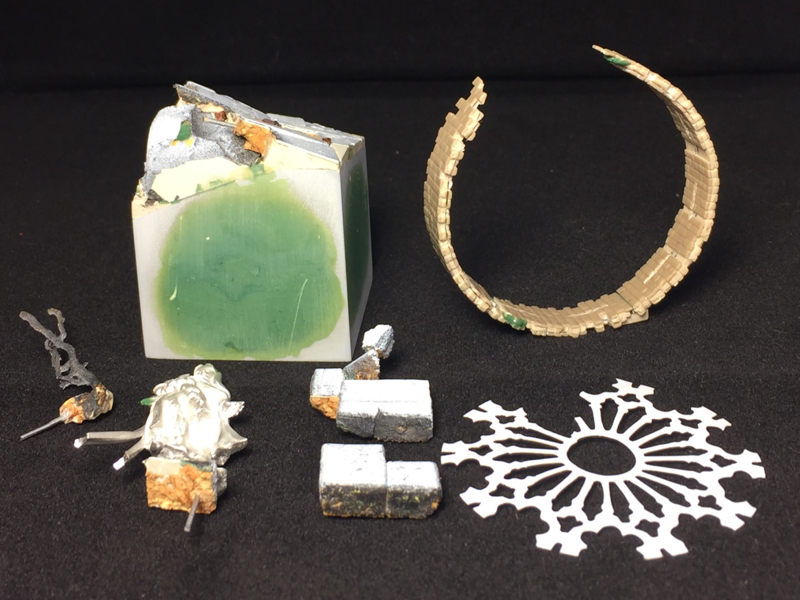
The base is basically scratch built, using juweela bricks, textured plastic card (stonework and bricks), cork tile, putty, roots, and a couple of paperclips to provide armatures for more fragile components, atop a Secret Weapon resin cube. I did use two off-the-shelf components: the stained glass support structure (the cames), and one of Scibor’s resin cast stone faces. The stained glass cames is a plasticard cutout from a prototype product line that a friend of mine, Seth Amsden, is working on, to be called “Sensei’s Scenics.” It will be available before the holidays, and you can find out more by following Seth on Instagram.
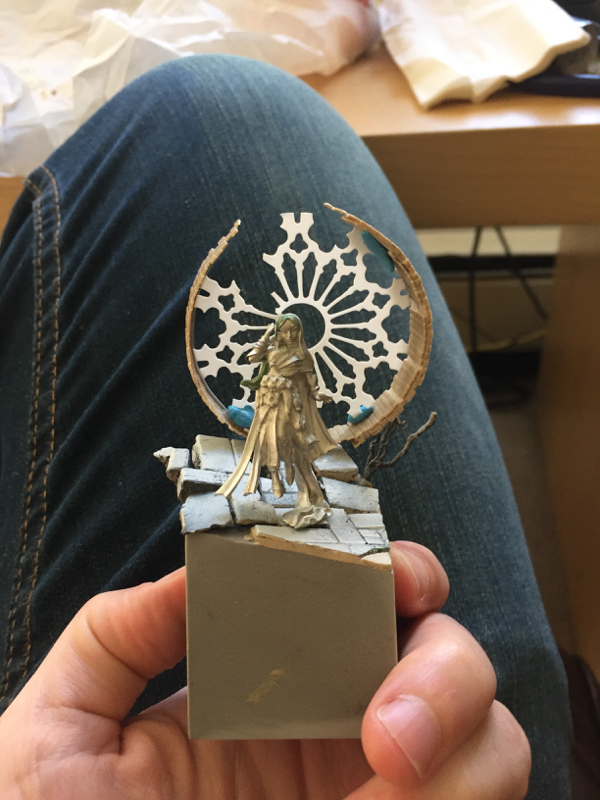
This picture, with my jeans in the background and lots of blue tac, shows the test fit where I finalized the basic composition of the piece. I think I nailed the front view, with the figure nicely framed by the elements behind her, while leaving enough unusual angles and gaps to keep things interesting from other views.
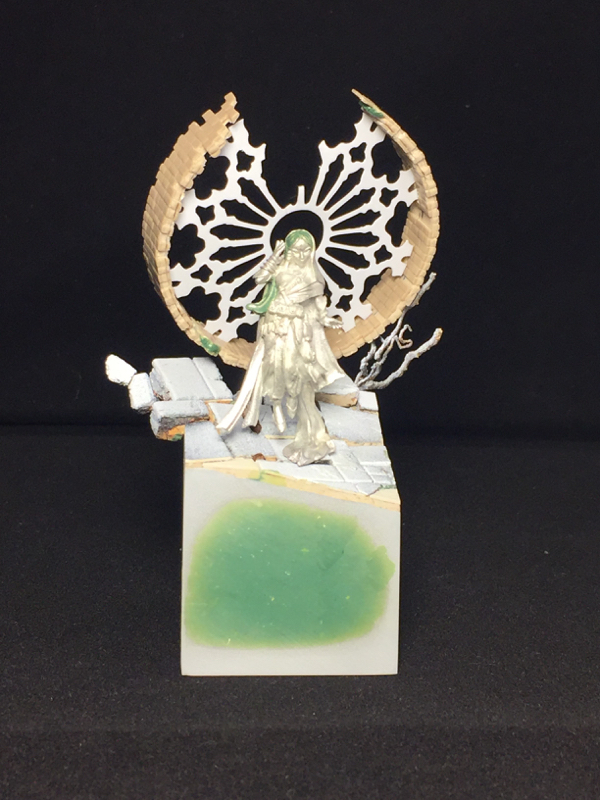
In order to get the sides perfectly smooth, I built the central part of the base and the protruding elements as separate pieces, with lots of test fitting. That way I could sand all of the walls of the central part until they were nice and flat. This sometimes involves a couple of rounds of sanding, priming, and sanding more, since priming will reveal flaws that you didn’t know were there.
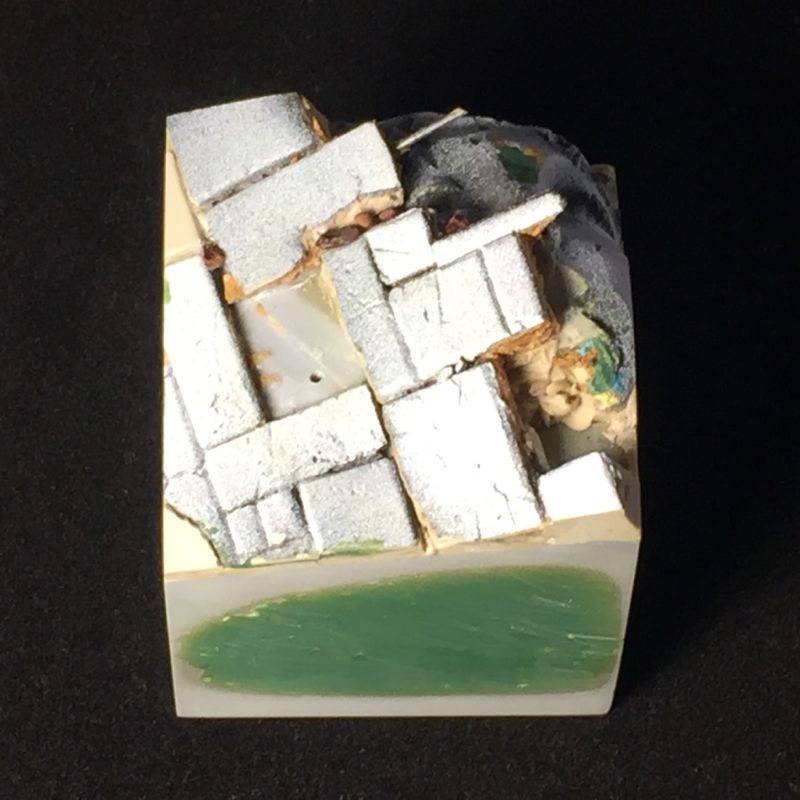
Once you have those nice flush sides, it’s best to get a nice thick coat of black primer and then a clear coat, with no brush-applied paint. This keeps things nice and smooth, and also primer & clear coat will stand up to handling better than brushed-on paint. The downside is you need to be careful not to mar the surface, as you will never be able to replicate that finish once the piece is completely assembled and painted.
I chose to prime the psychic herself white, in order to get nice bright colors, while pre-shading the base with two-tone priming. This helps the psychic herself pop from a distance, and stand out from the base. I kept the psychic as a separate piece for painting, to allow easy access to all angles, and mounted her on one of the stone blocks from the base so I could easily mate the two parts when finished.
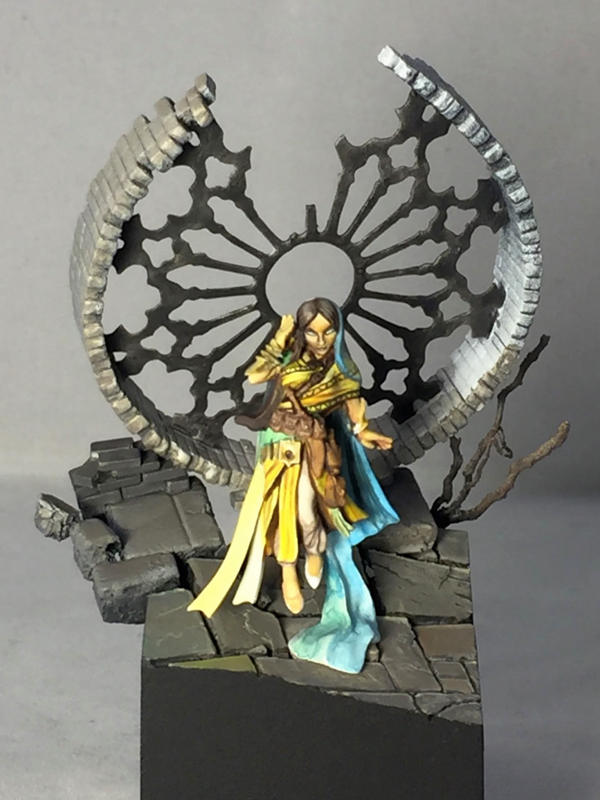
The painting itself was very quick, so unfortunately I only have three work-in-progress photos. Some painters like to keep the miniature very clean from start to finish, starting with very uniform base coats and building from there in a very controlled fashion. This is not my approach at all. I like to create contrast and overall impact quickly, which leaves lots of signs of my process, such as visible brushstrokes and “tide marks” from washes. Both types of process have their own pros and cons, but for me a more chaotic process is simply more fun, and that wins.
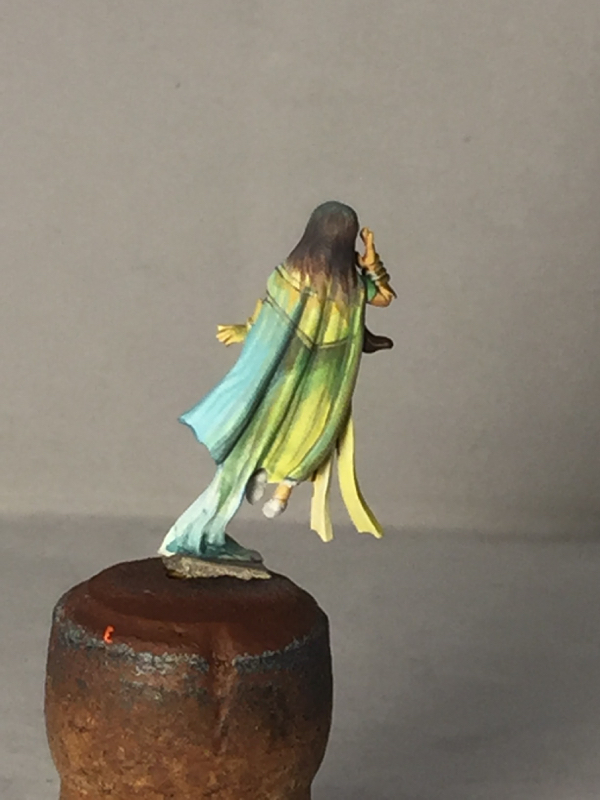
I initially planned a strong translucency effect for the psychic’s veil, so this early sketch from the back mainly depicts the psychic’s clothing under the veil, rather than the veil itself. As painting progressed, the veil ended up being much less translucent than my initial vision, although you can still definitely see through it in places.
One of the great things about Bobby’s sculpt is the number of smooth, relatively flat areas he left for freehand. Miniatures that leave some flat surfaces give the painter more flexibility than miniatures which are extremely detailed everywhere. I tend to prefer more geometrical freehands, so that’s mostly what I did. I also freehanded-in some folds in the fabric where I thought the sculpt was a bit too smooth.
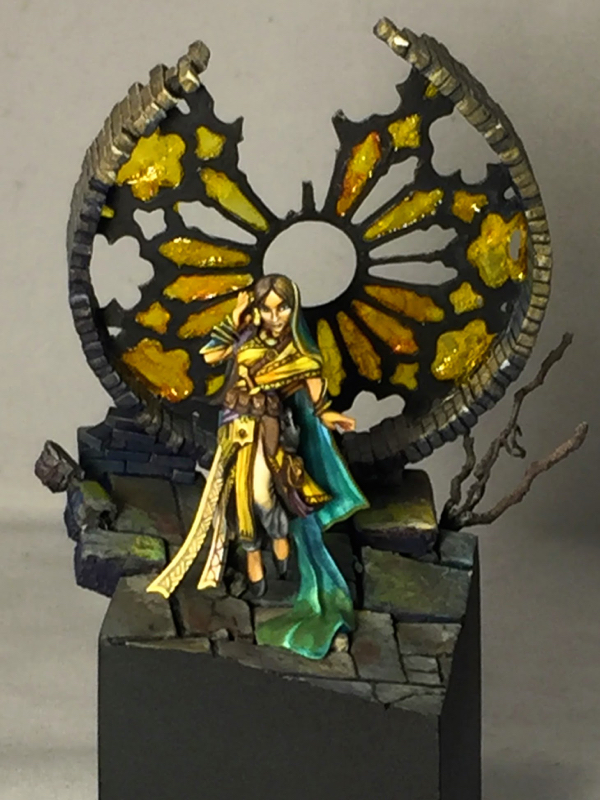
The stained glass itself is made out of Uhu, the german glue brand that some folks like to use for blood and goo effects. It is clear and sufficiently durable to hold its shape when covering windows like this. When used to create flat sheets, like I’ve done here, it picks up lots of bubbles and has extremely variable thickness. For some applications this would be a problem, but I think it works wonderfully for this sort of medieval glass window where the quality of the glassmaking would be somewhat primitive.
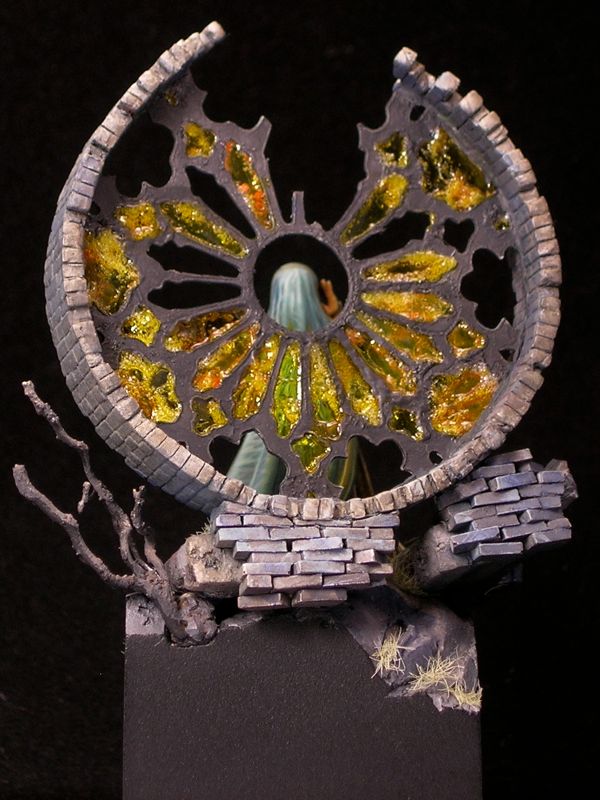
I colored the glass by waiting for the Uhu to dry, and then painting over it with a mixture of Tamiya clear yellow and Daler Rowney orange ink. By varying the mixture between orange ink and clear yellow, and the thickness of the paint over the Uhu, I was able to vary the color a bit, adding to the non-uniform appearance of the glass. Rather than worrying about painting inside the lines for this, I simply covered everything using a brush that was big and cheap (that tamiya stuff is bad for your brushes). I then went back with an off-black and carefully repainted the cames.
Psychic’s Dream won a gold medal in the open judging at Reapercon, and placed third overall in the Reaper painter’s competition.
Leave a Reply